How to create a floor plan in Cacoo

Cacoo Staff
January 15, 2024
Floor plans are crucial design tools, helping architects and real estate professionals design and iterate new layouts for offices, homes, and more. The right platform makes it easy to experiment with moving around furniture, walls, doors, and more to efficiently use the available space.
Creating a floor plan isn’t something that’s reserved purely for architects, however – anyone can do it. Regardless of your role, floor plans help visualize new layouts and create a better environment.
If you’ve ever created a floor plan online, you’ve likely experienced some of the pain points associated with most online floor planning software platforms. From ensuring the accuracy of your plans to collaborating with your teammates, many platforms make it difficult to create quick, simple floor plans.
Good news: if you need a more approachable way to create online floor plans, you just found it.
Meet Cacoo: A simple, intuitive floor plan designer
Cacoo is an online floor plan creator that enables anyone to quickly create and edit online floor plans. A cloud-based software tool, Cacoo comes with a variety of floor plan templates plus a wide range of features that enable teams to collaborate closely on their designs.
It’s the perfect solution for everyone, from interior designers to office managers, allowing you to experiment with multiple ideas before you start moving furniture. Once you’ve created your office floor plan, you can use it in a variety of ways: to create a seating chart, plan for furniture purchases, and more.
Cacoo offers several features that make it a popular choice for floor plan creators. From pre-configured floor plan templates with all the assets you could ever need to real-time collaboration and presentation tools, Cacoo is the perfect solution for anyone dabbling in floor plan design.

We will walk you through the process of creating your first floor plan in Cacoo. We’ll provide all the guidance you need to create a digital replica of your office or home floor plan and show you how to use Cacoo’s features to bring your space to life.
If you like, you can follow along with us and design your own floor plan by creating your free Cacoo account.
Step one: Gather information about your space
Before you sit down at your desk to start creating a floor plan in Cacoo, you first need to collect some information about the space you’ll be creating a floor plan for.
Start by measuring your space, creating a rough sketch of its dimensions, the positions of any walls, doors, or windows, and the position of any furniture or decor. Note any internal cubicles or walls that can be moved as part of your revised floor plan.
A quick sketch on a piece of paper is fine at this stage. Don’t worry too much about getting the dimensions completely perfect: Cacoo has plenty of tools to help you refine your floor plan as you continue through this process.
Depending on the situation, consider meeting with your team to discuss the goals for the new floor plan. Perhaps you’re redesigning your office to fit in more desks in advance of a hiring spree. Or maybe you’re planning to reconfigure your office to have more room for meeting rooms and fewer cubicles. Whatever the case is, everyone must align on the goals for your new floor plan design.

Step two: Create a project and choose a template
Once you’ve collected the basic information you need to create a floor plan, it’s time to get to work in Cacoo. At this point, you have two options: creating your floor plan from scratch or using one of Cacoo’s pre-built templates.
If it’s your first time creating a floor plan in Cacoo, using one of the pre-built templates is the best way to get your project off to a fast start. Users can select from the following floor plan templates:
- Office Building Floor Plan: If you’re redesigning your office to find a more efficient use of your space, this floor plan template is the perfect option.
- Office Floor Plan: This office floor plan template includes conference rooms, smaller breakout meeting rooms, desk banks, and more.
- Cubicle Layout: Experiment with different ways to configure the cubicles in your office to ensure your employees have plenty of space to get their work done.
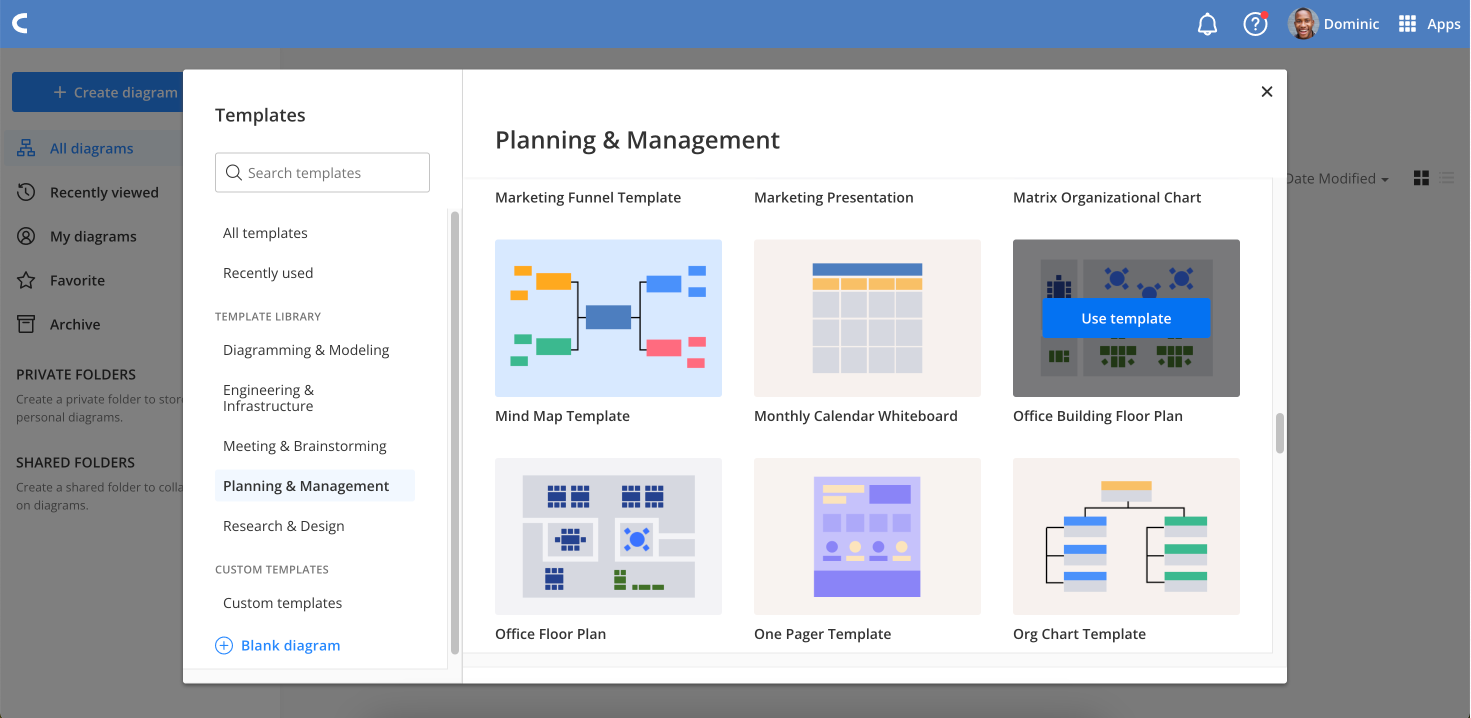
To view all available templates and choose the best option for your project, click the Template icon from your Cacoo dashboard to open the Cacoo Template Library.
You’ll find all of Cacoo’s floor plan templates under the Planning & Management tab, or just search “floor plan” to pull up the options. Once you find the template you’d like to use, select Use template to open up a new Cacoo diagram.
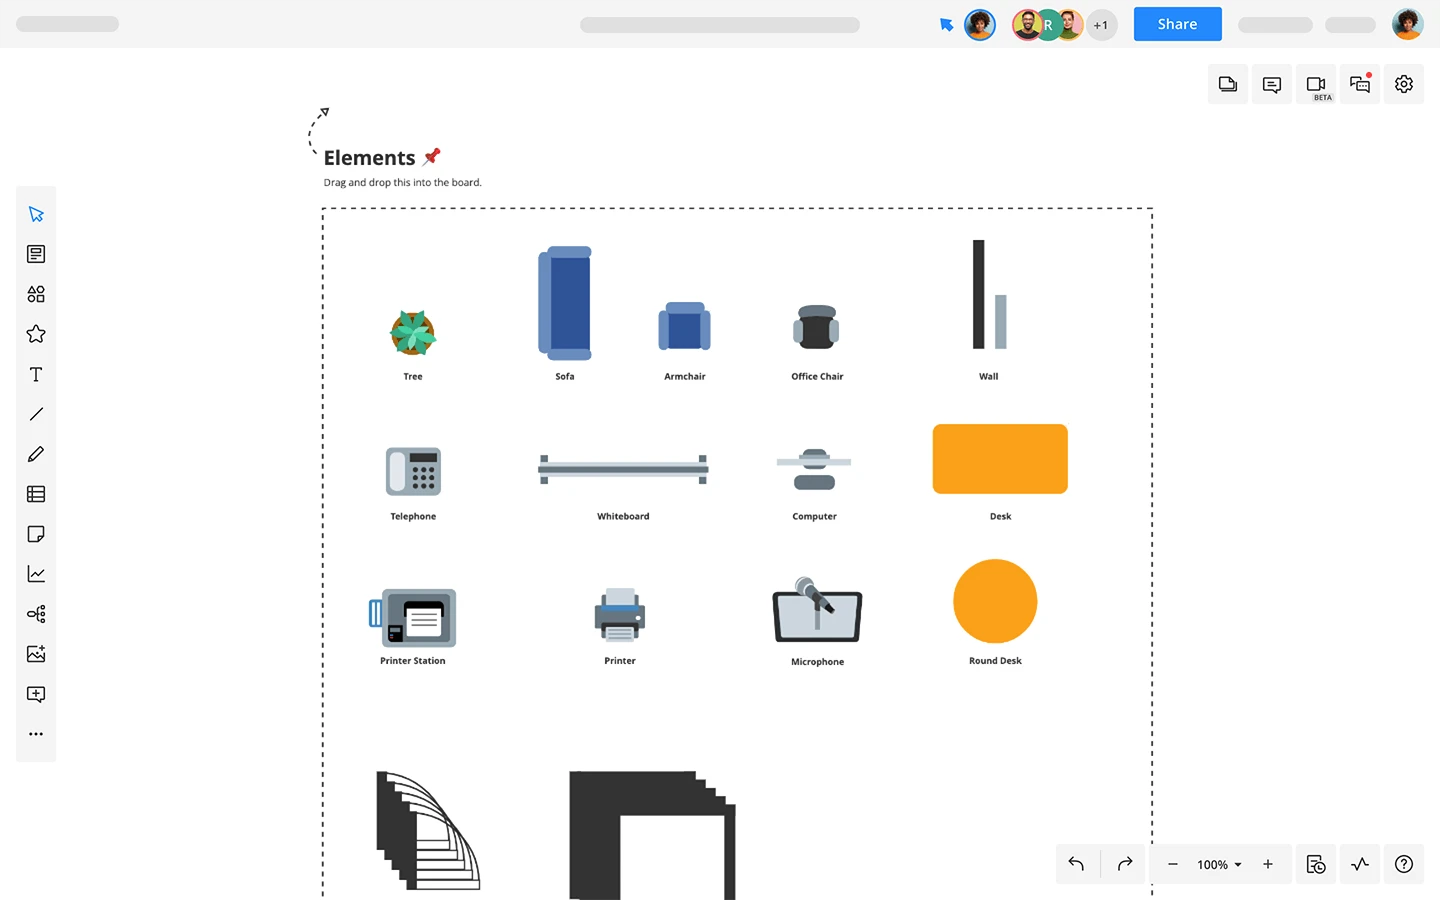
Once you open your template of choice, spend a few minutes familiarizing yourself with all the assets included in each floor plan template. Cacoo’s floor plan templates include walls, doors, office furniture, and even items like whiteboards and printer stations.
If you choose not to use one of Cacoo’s pre-built templates, creating a floor plan from scratch is still relatively straightforward. Just click the + Create diagram tab from your Cacoo dashboard to open a blank diagram and follow the steps outlined below in step three.
Step three: Add walls, doors, and windows
Next up, it’s time to start customizing the floor plan on your screen in Cacoo to match the characteristics of your space better. While we’ve based our floor plan templates on traditional office layouts featuring cubicles, banks of desks, conference rooms, and more, we know it’s likely that your office looks a little different.
Fortunately, Cacoo makes it easy to move and add walls, doors, and windows to your floor plan.
Adding walls to a Cacoo floor plan
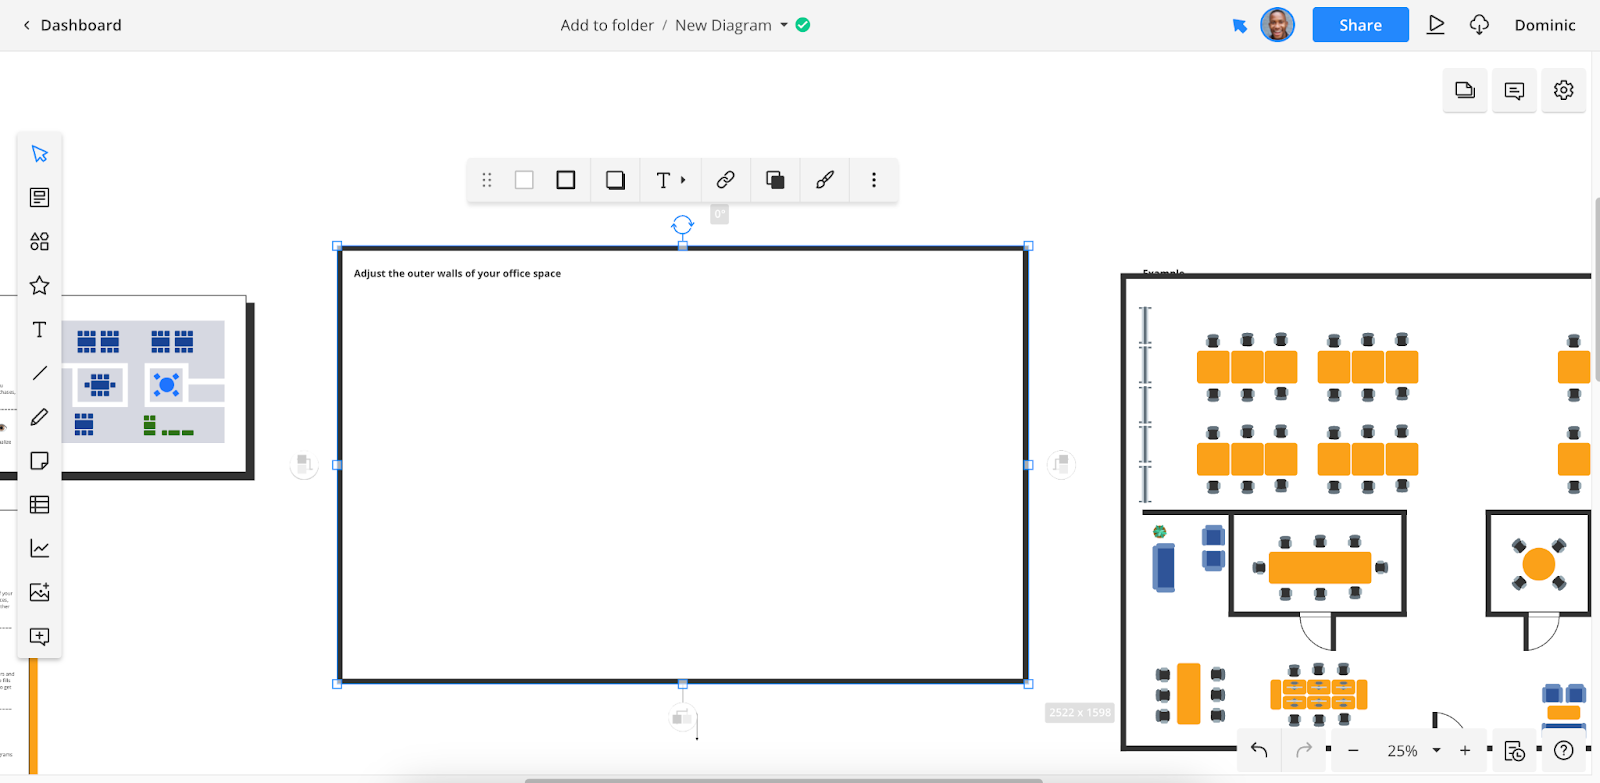
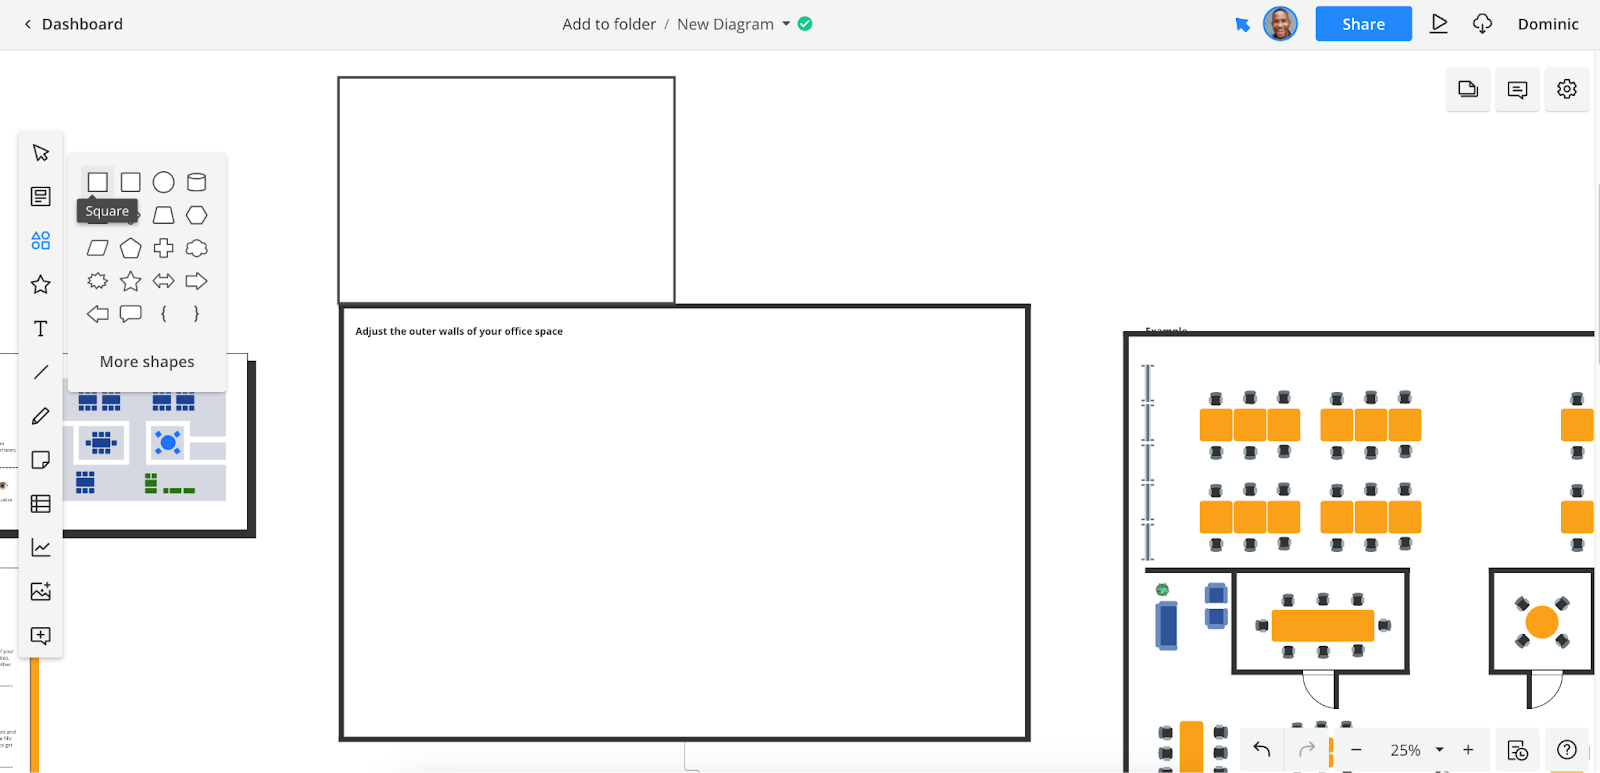
To adjust the outer walls of your office space in the Cacoo floor plan template, simply select the rectangle that denotes your outer walls. You can adjust your space horizontally, vertically, or diagonally, making it easy to create the perfect replica of your office floor plan.
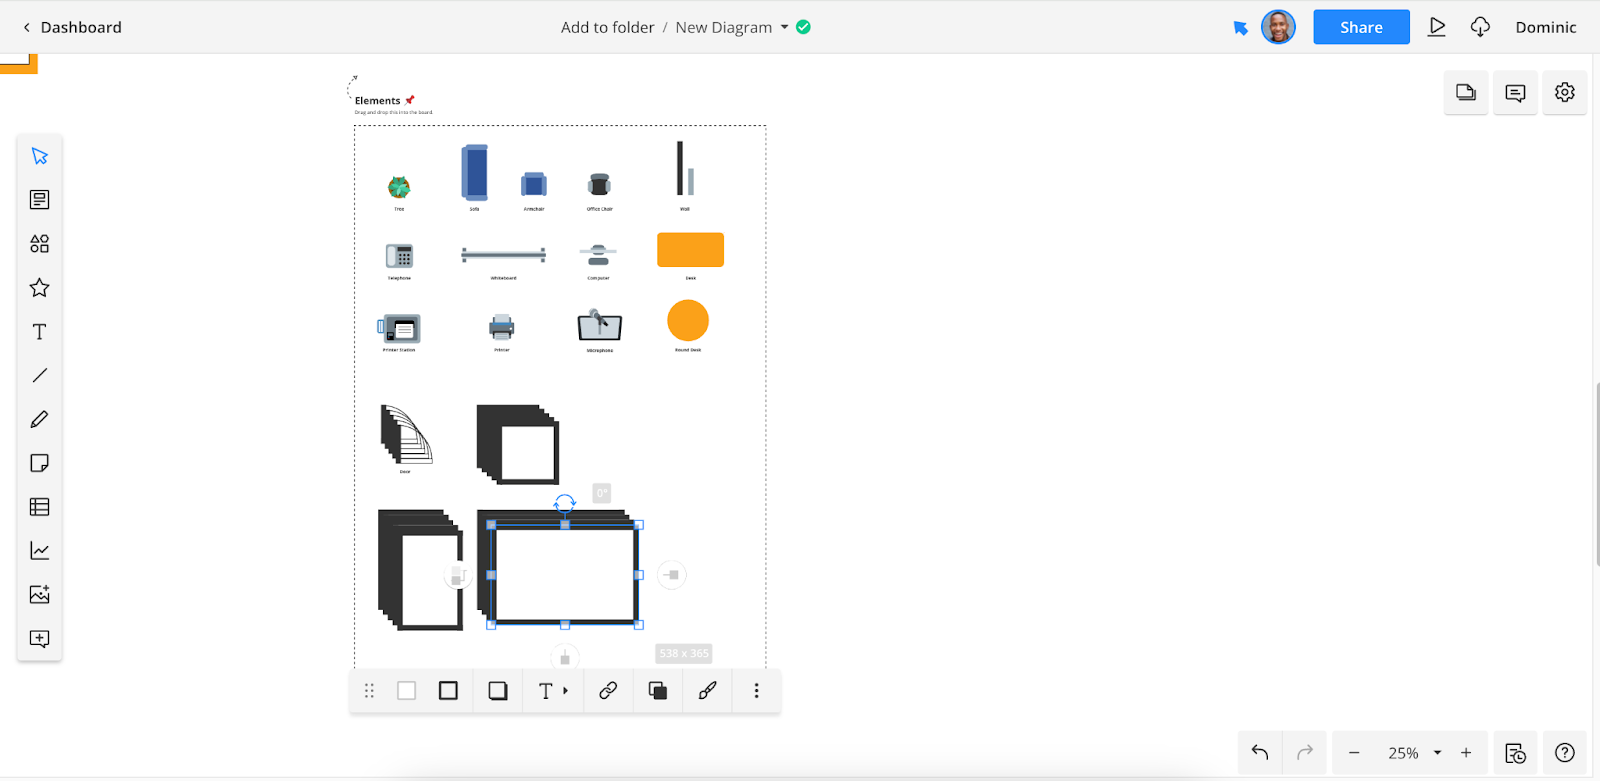
If your office isn’t a square or a rectangle, you can also add new outer walls by adding new shapes to your diagram. To do so, you have two options. If you’re using a template, the most straightforward way to add new walls is to drag and drop new walls or rooms from the Elements section of your diagram. You can drag, drop, and resize any room or shape to your existing layout, making it easy to customize the floor plan to your space.
If you’re not using a template, click the Shape icon in the toolbar on the left of your screen, and then select the shape you’d like to add and drag it across to your diagram. If it’s easier, you can also add lines to your diagram using the Line icon in the toolbar.
Add as many shapes or lines as you like – no matter how unusual your office floor plan is, you can capture it in Cacoo! As you move shapes and lines around your diagram, you’ll see when they’re aligned with each other, making it easy to ensure all of your walls line up perfectly.
To distinguish between different types of walls, for example, interior and exterior walls, change the color or the type of line you use (for example, a dotted line vs. a solid line). This helps you understand which walls are non-structural and can be moved and which must remain untouched.
Adding doors to a Cacoo floor plan
Once you’ve configured your walls, it’s time to add doors to your Cacoo floor plan. These are crucial in helping you understand how people move around your workplace and are also important for denoting emergency exits and evacuation routes.
Adding doors is simple in Cacoo. If you’re using a Cacoo floor plan template, you’ll find the doors in the same place you found the additional walls: in the Elements section of your diagram. Repeat the process from the last step, dragging and dropping doors to the appropriate location on your diagram, using the snap-to-grid feature to ensure everything is perfectly aligned.
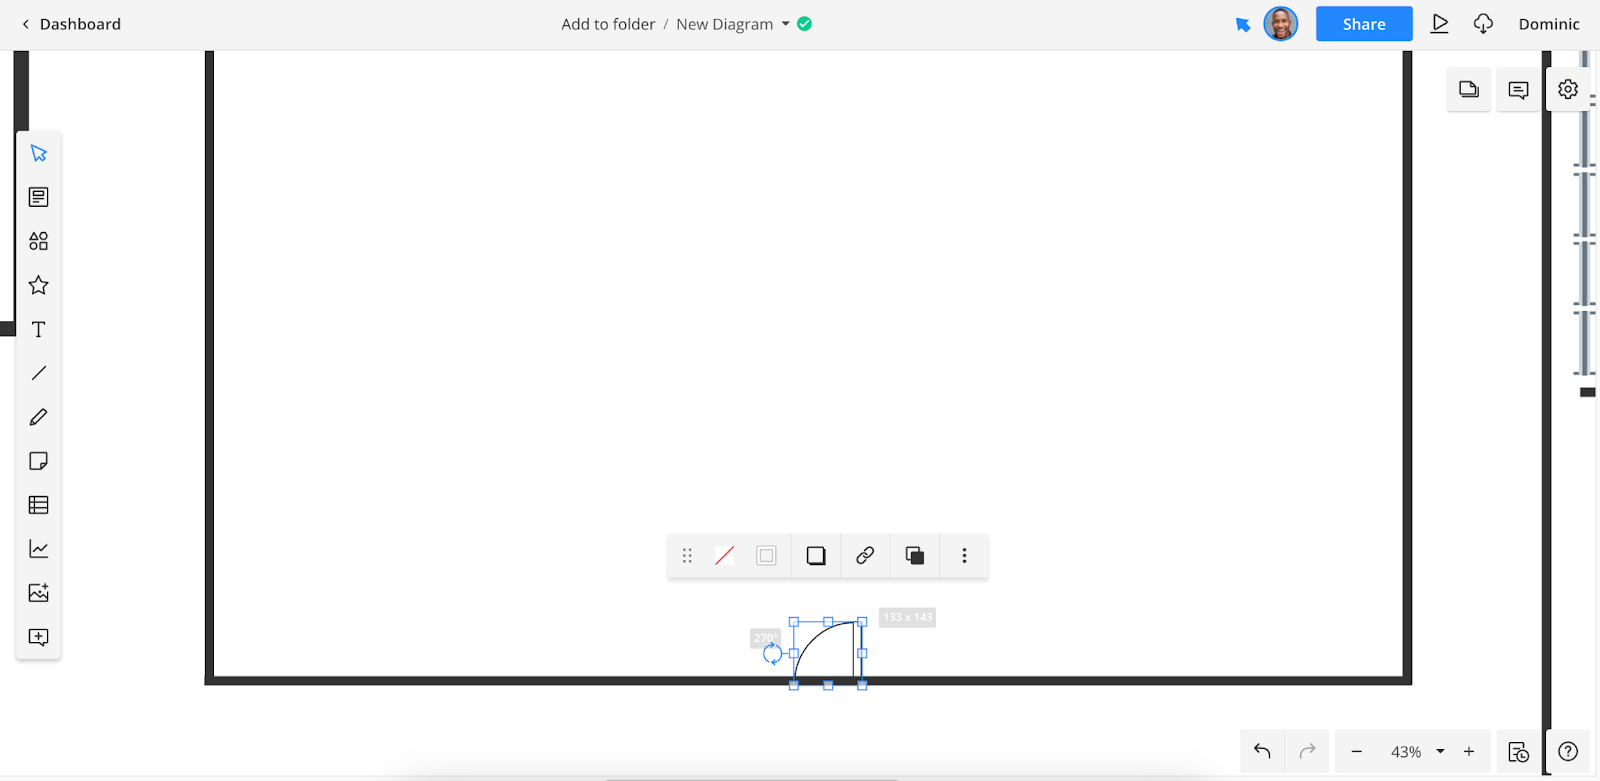
Pay attention to the swing of the door. Most doors open inwards: when you enter a room, the door swings into the room. This often means you can’t place anything right next to the door. Some doors swing to the left, while others swing to the right, and you should pay attention to this in your diagram, too.
To change the door swing, simply place the door at the appropriate position on the wall and then rotate the door shape to change the swing to the correct position. In the example below, the door swings inwards and to the right. The curved line displays the swing path of the door. If any furniture or decor items are placed there, the door will hit them as people use it, so make sure to leave plenty of space.
If you have different types of doors, say a sliding door or a revolving door, you can add these from the Cacoo shape library. Select the shape that’s the best representation of your door and use the drag-and-drop feature to add it to the diagram.
You can also change your door’s colors to add meaning to them. For example, you may mark entry and egress doors in a bright red color so that everyone understands that they are the doors that should be used in an emergency.
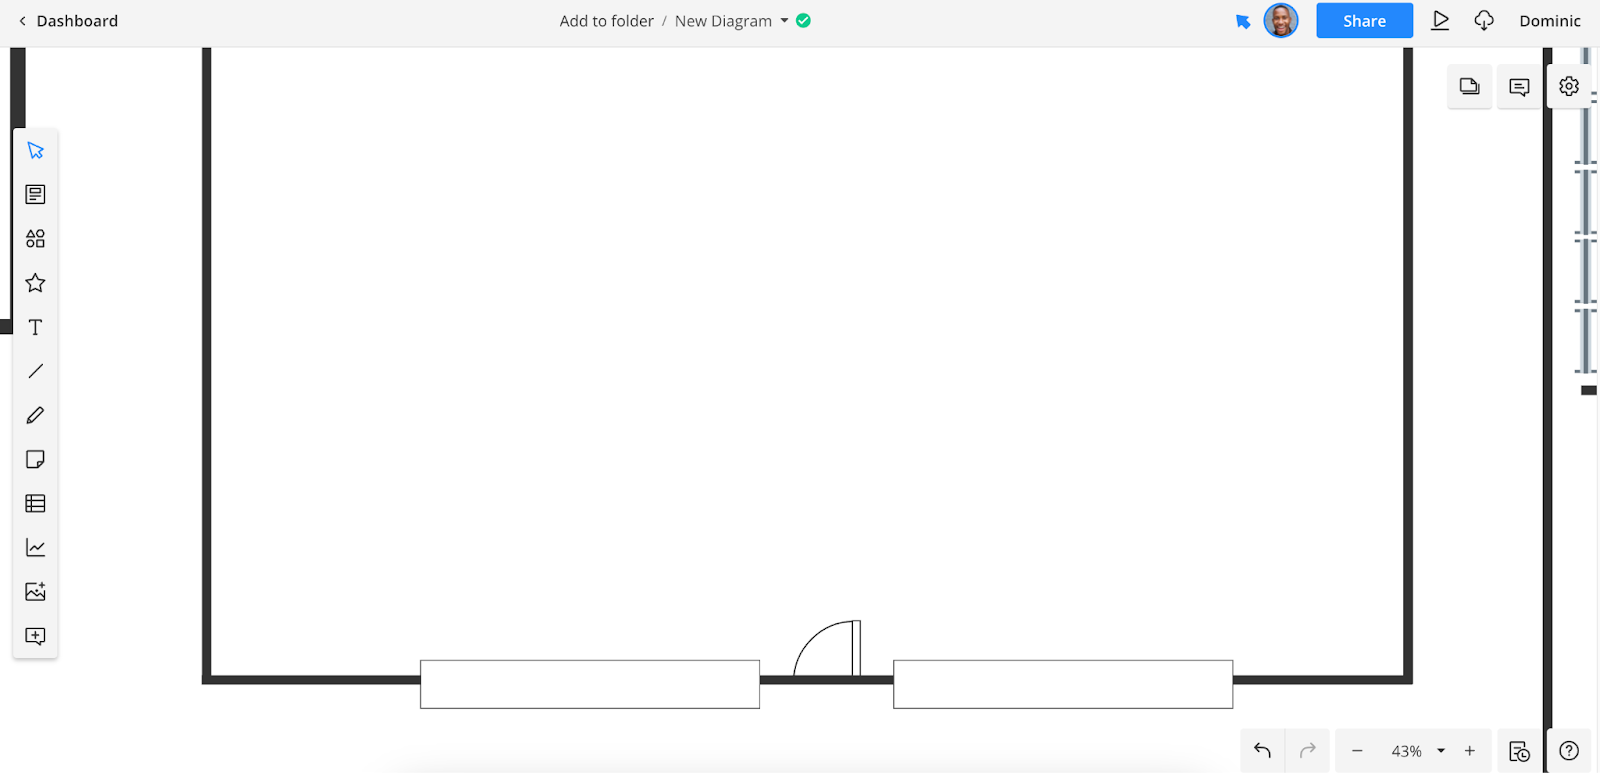
Use the same method to add windows. Windows are less important to your design than doors, but it’s still important to note where they are and understand how the light they introduce will affect your space. In floor planning, windows are typically denoted with a rectangle that protrudes on both sides of the walls, as shown in the example below.
Step four: Add furniture and decor
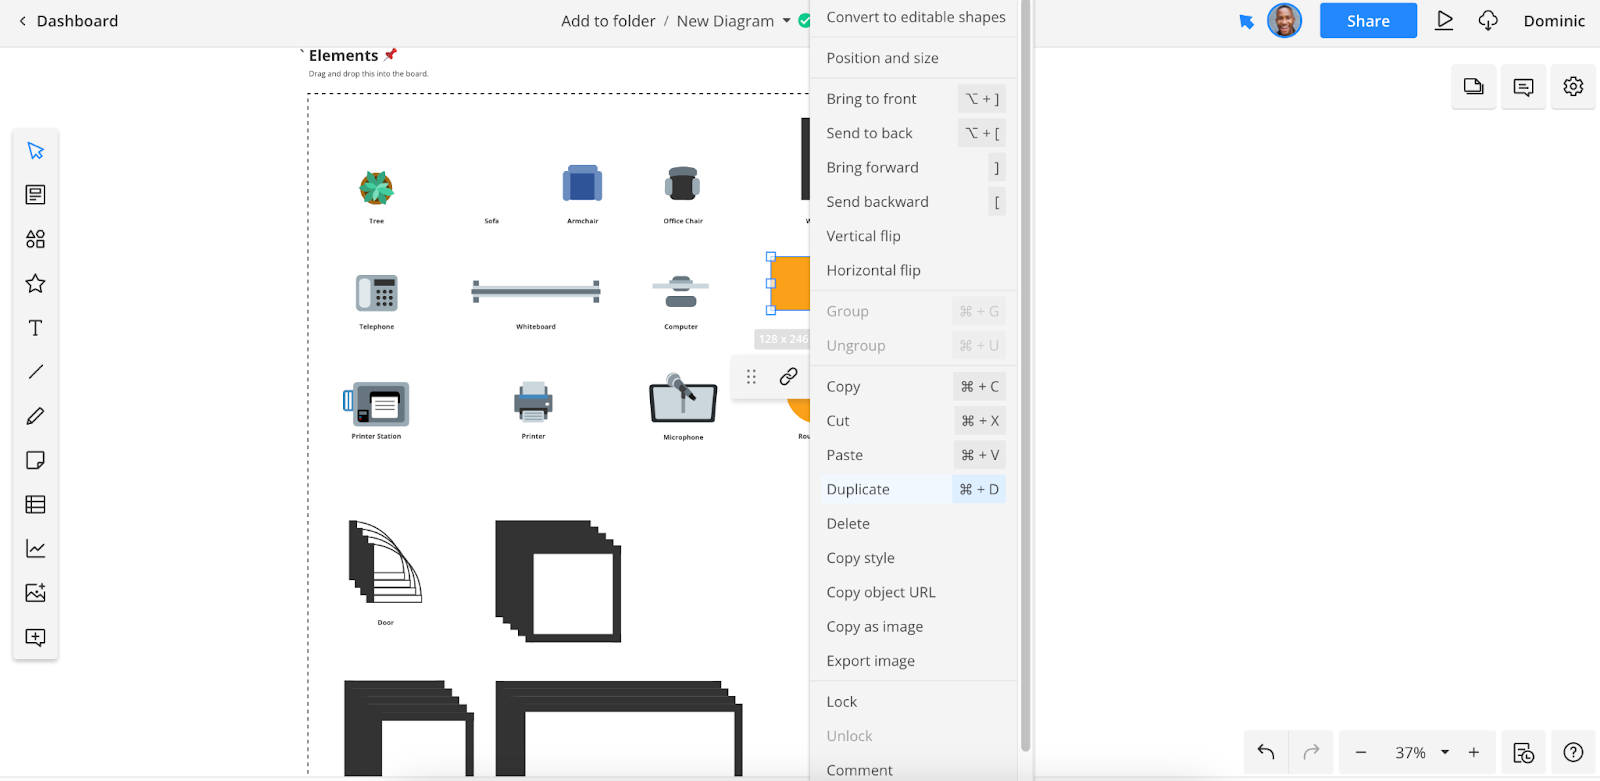
Now, it’s time for you to figure out where to best place the different furniture and decor in your office space. If you’re using a Cacoo floor plan template, you’ll find furniture and decor in the Elements section of your diagram.
Adding furniture and decor to your floor plan is simple – just drag and drop it into position, the same way you did for the walls, doors, and windows in the previous step. To create several versions of an element, e.g., to create more desks, simply right-click the item you’d like to copy and then select Duplicate from the drop-down menu. This allows you to easily create multiple desks, chairs, computers, and more.
Drag and drop the furniture and decor items to your floor plan. Don’t be afraid to experiment with different layouts – create multiple versions of your floor plan and then tweak the layout to find the most efficient use of your team’s space. You can rotate, re-format, and re-size any furniture or decor using the features described in the previous section.
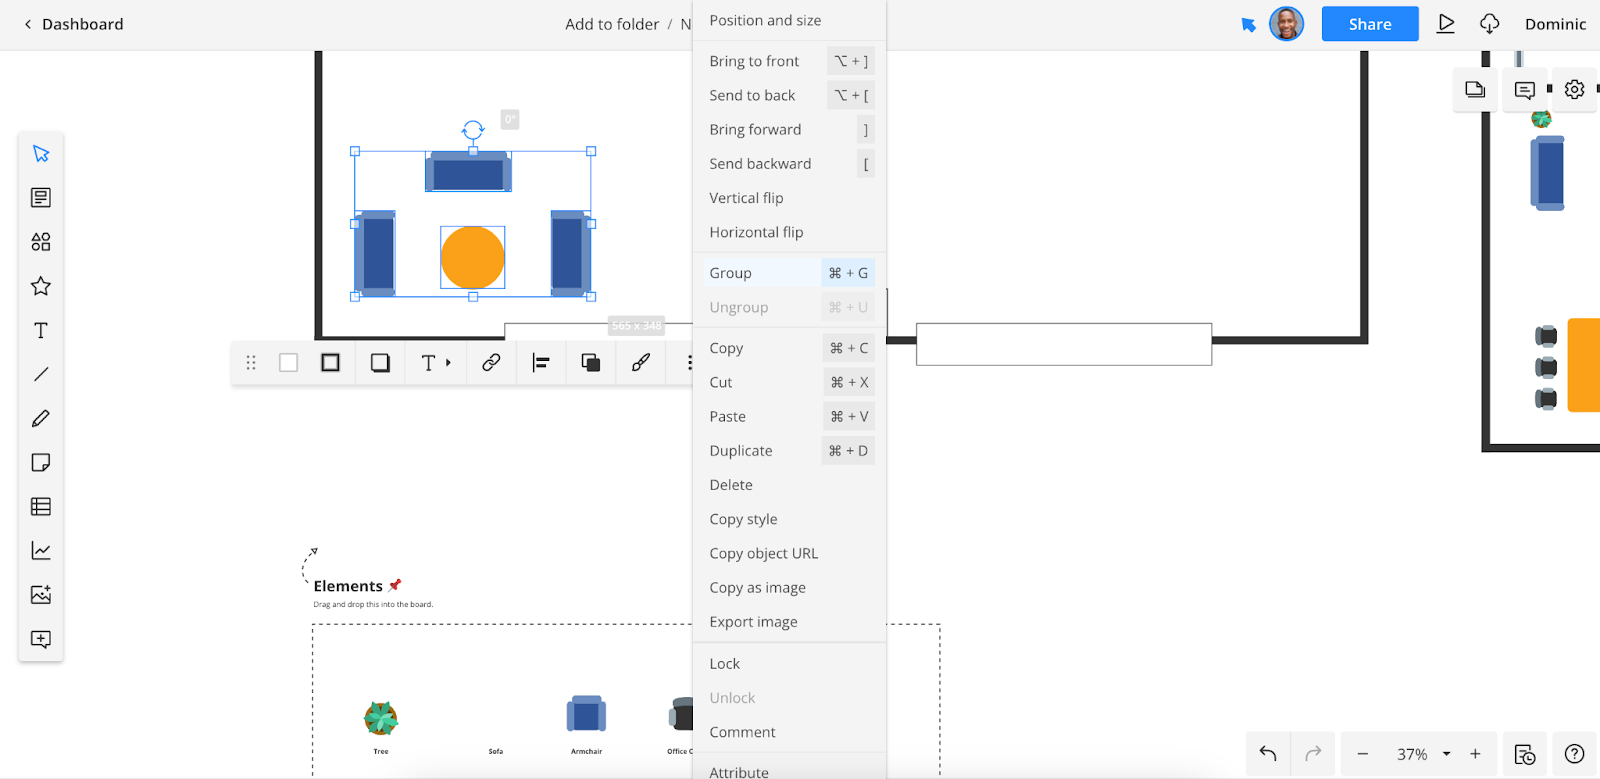
It’s often helpful to group different furniture items together to make them easier to move and edit. This makes moving items like a bank of desks or a conference meeting table far more efficient. To group items, simply drag your cursor over the items you’d like to group, click the … icon in the toolbar, and then select Group.
Step five: Add annotations
As you go about the process of creating your Cacoo floor plan, you’re making a lot of decisions. Before you share your floor plan with other people, whether that’s your colleagues, your boss, or an external partner, it’s important you include some annotations that explain why you made certain choices.
Cacoo offers users a couple of different ways to add these annotations to their floor plan diagrams:
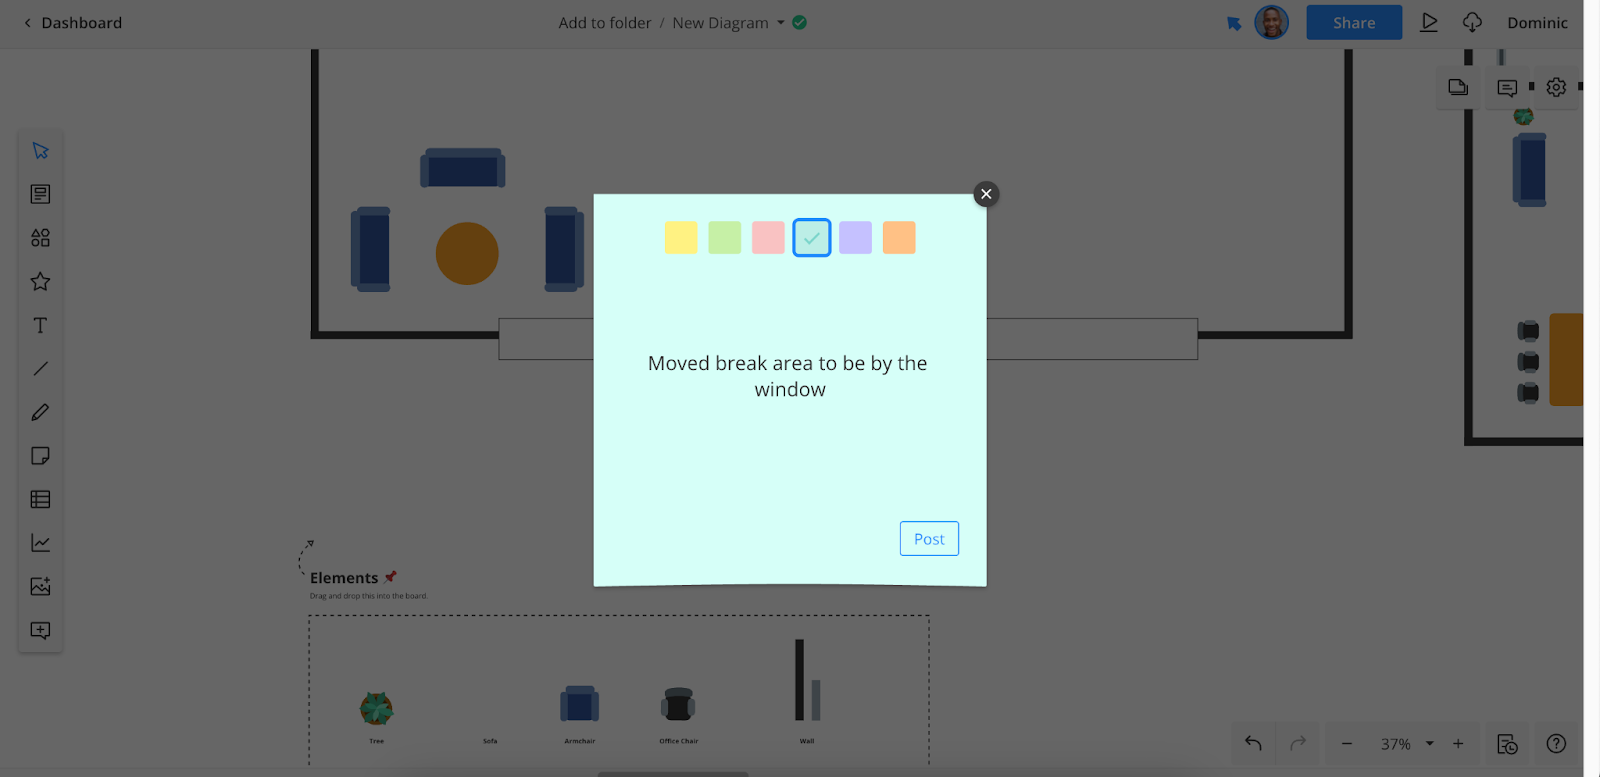
Sticky notes: add a sticky note to any floor plan by clicking the Sticky Note icon on the toolbar on the left-hand side of the screen. Add your annotation to the sticky note and choose the color you’d like your sticky note to be. Then, click Post and drag your sticky note to the appropriate position on your floor plan.
Comments: attach a comment to a specific element of your floor plan by clicking the Comment icon on the toolbar and selecting the element you’d like to add a comment to. Add your annotation and tag any team members you’d like to review the comment. They’ll receive a notification that you’d like their input.
Step six: Share and collaborate on your floor plan
Once you’ve put the final touches on your floor plan, it’s time to share it with your team! Regardless of whether you want to print it out for reference or send it to your teammates for their feedback, you’ll find an option in Cacoo that fits your needs.
Sharing your floor plan
Cacoo offers several ways to share your floor plan with your teammates, including:
- Add collaborators: Add your teammates to your floor plan by entering their email addresses or names (if they already have a Cacoo profile), specifying whether they have read- or view-only access.
- Link: Create a custom diagram link that you can share with anybody.
- Embed code: Generate custom code to embed your floor plan in external web platforms, such as company wikis or intranet pages.
To access these features, click Share in the top right corner of your diagram and select how you’d like to share your floor plan.
Collaborating on your floor plan
Cacoo is a collaborative floor plan designer made with teamwork in mind – that’s why the platform comes with a wide range of collaboration features.
Cacoo’s built-in chat and video calling tools are among the most popular of these. Multiple team members can work together on the same diagram in real time, exchanging messages in a dedicated chat thread and initiating video calls directly from the Cacoo app. With a live cursor view, it’s easy to understand what everyone is working on and work together to refine your floor plans in real time.

Exporting your floor plan
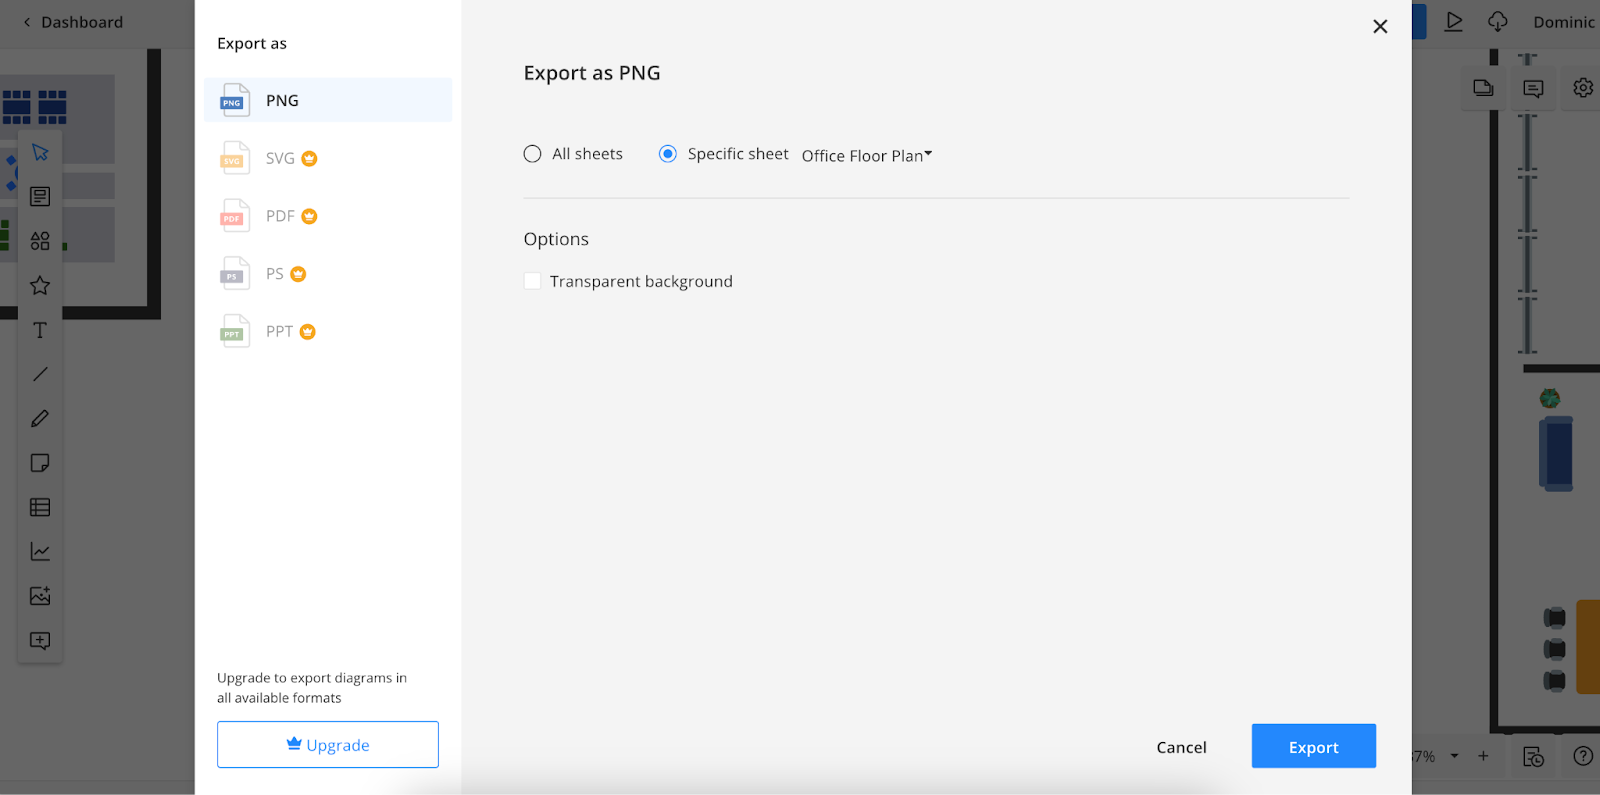
Cacoo floor plans can be exported in various formats: PDF, PPT, SVG, and more. If you like, you can even print your floor plan directly from Cacoo.
To export your floor plan, click the Export / Print icon in the top-right corner of your diagram and select how you’d like to export your diagram.
Create your first floor plan in Cacoo today
Congratulations – you now know everything you need to create your very first Cacoo floor plan. In no time at all, you’ll be on your way to redesigning the layout and flow of your office to create a better working environment for your team.
Get started today by signing up for a free Cacoo account, or dive deeper by exploring more Cacoo features and floor plan templates.

