Git
Summary of Git
Git is one of the distributed version control systems to manage source codes efficiently. By pressing "Enable Git on this project" on Project settings > Git settings, Git tab will be shown in the project menu and you'll be able to use Git on Backlog.

Repositories created on Backlog can be accessed via SSH or HTTP.
Each URL is:
- SSH: [Space ID]@git.backlog.com:/[Project key]/[Repository name].git
- HTTP: https://[Space ID].backlog.com/git/[Project key]/[Repository name].git
e.g..)
SSH: demo@git.backlog.com:/DORA/cat-robot.git
HTTP: https://demo.backlog.com/git/BLGDSGN/cat-robot.git
For SSH connection, you can access the repository by registering SSH public key on Backlog. For HTTP connection, you can access the repository with your Backlog ID and password.
Unlike the Subversion repository, multiple Git repositories can be created for each project.
Only administrators and normal users can access repositories on Backlog server and Git pages. Other users, such as reporters and goes users, cannot access the repositories.
Register SSH public key
To access Git repository on Backlog via SSH, SSH public key needs to be registered. Paste the SSH public key info on Personal settings > Register SSH public key, and press "Register" button.

Git repositories
Repositories can be added, edited, or deleted on Git settings page. Please access it from Project settings > Git settings.

Git settings
By checking "Connect issue references and log keywords" box and adding a comment when you commit, the comment will be automatically posted on the issue. Issue's status also can be changed by entering certain keywords (such as #closes, #fixes).
Choose "Disable Git" to stop using Git on the project.
Please be careful as all Git repositories on the project will be deleted when Git is disabled.

Create Git repository
To create a repository on Backlog server, click "Add repository" on Project settings > Git settings. After entering the repository name and description, press "Create repository" button.

Edit Git repository
To edit a repository, click edit next to the repository to edit on Project settings > Git settings.

Git top
The list of Git repositories and recent updates will be shown on the top page of Git.

Repositories
The list of repositories on this project will be shown. Clicking the buttons next to "SSH" or "HTTP" will copy the URL. Use the Filter Repository box to search using a repository name or description.
Recent updates
Git related updates, such as push by other project members, new repositories, new branches, will be shown in chronological order. From here, you can access details of recent operations easily.
Repository browser
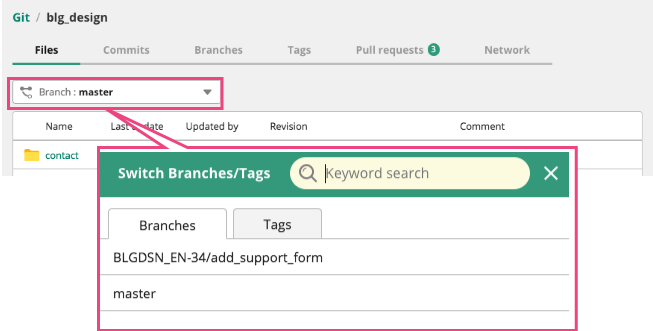
Access the updated repository tree. Repository, branch and tag can be switched from the navigation on top.

File browser
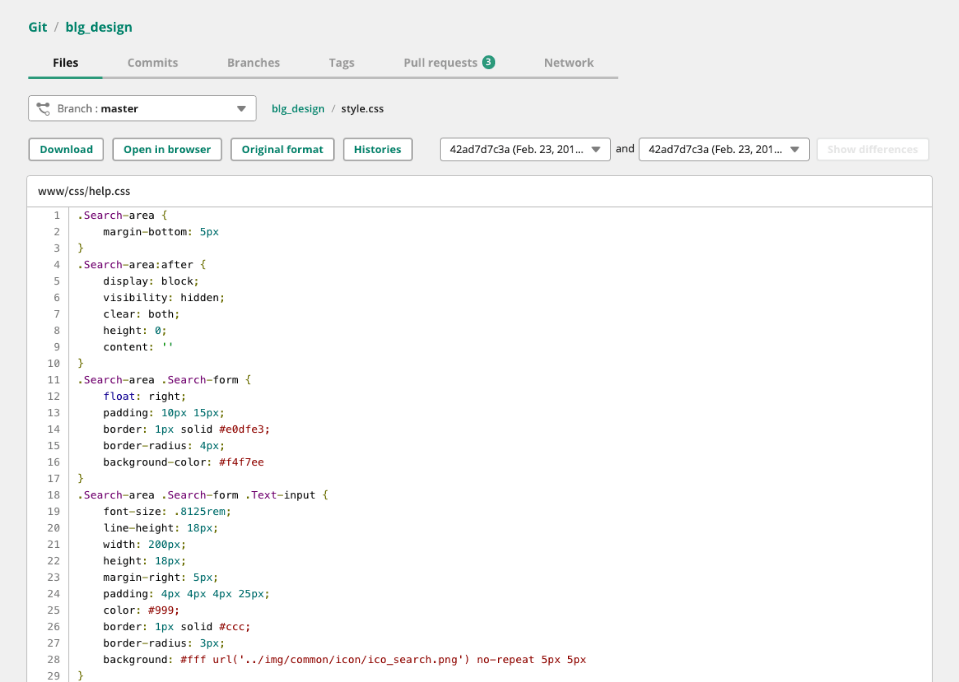
Description and line number of text files, such as source codes and HTML files, will be shown in color. You can show the description or download it. Image files will be resized to show it properly.

File diffs
You can show the file diffs between revisions. Added parts will be shown in green. Deleted parts will be shown in pink.

Commit history
Show the repository's commit history here. By switching branches, commit histories for each branch can be checked. When the history is viewed from file browser, the history alone of the specific file can be viewed.

Commit detail
View when the revision was updated, who updated it and message regarding the commit. List of paths that have been updated with this revision or files' diffs can be checked on this page.

Operation in issue by commit log
If the issue number (i.e. BLG-1234) exists in the commit log, the commit log can be registered as a comment on an issue.
By adding unique keywords to the commit log, ''the issue's status can be updated. Keywords to update issue are:
- either #fix #fixes #fixed to change status to resolved
- either #close #closes #closed to change status to closed

* This feature is activated by putting a check mark in "Integrate commit and issue" in Git settings. Please check here to find out how to integrate commit log and issues
Branch
The list of repository branches is shown here. To filter the branches, enter the full or a part of the branch name.

1. Compare branches
Click "Compare" buttton to go to the Compare branches/tags page.
2. Pull requests
Click "Add" button to go to the Add pull request page.
3. Delete
To delete a branch, click on the ![]() button in the branch list. A dialog box asking you to confirm the deletion will pop up. Select 'OK' to proceed or 'Cancel' to cancel the action.
button in the branch list. A dialog box asking you to confirm the deletion will pop up. Select 'OK' to proceed or 'Cancel' to cancel the action.
Warning: You will not be able to undo this action.
Master branch cannot be deleted.
Tag
The list of repository tags is shown here. To filter the tags, enter the full or a part of the tag name.

1. Compare
Click "Compare" buttton to go to the Compare branches/tags page.
Compare branches tags
You can access the "Compare branches/tags" page from the branch or the tag page. Choose the branches or tags that you want to compare.

Commits
Commits tab shows the differences of commits between the branches or the tags.

Files
Files tab shows the differences of files between the branches or the tags. Added parts are highlighted in green and deleted parts are highlighted in pink.

Pull request
The pull request is a function to propose other developers to take in the changes to the branch.
With Backlog's pull request, you can do the followings.
- Notify the addition and changes to the person in charge of reviewing and merging and other members
- Show the changed parts in the source
- Add comments to the codes
Pull requests
The list of registered pull request is shown on the Pull requests page.
By default, only the "Open" pull requests are shown. To show "Closed" or "Merged" pull requests, filter by changing the "Status".
Enter some words in the "Keyword" window to filter by keywords.

Add pull request
Access the Add pull request page from the Git's Branch page, the Compare branches/tags page or the Pull requests page.
Select the target branch (the base branch) and the pull request branch (the branch that will be merged) from the "Branch" pull down menu.
When the target branch and the pull request branch is selected, the changes in commits and files will be shown.
When the pull request branch includes a Backlog's issue key, the issue's subject will be shown in the "Subject" box.
The issue key will be put automatically in the "Related Issue" box. You can manually change these if necessary.
"Subject" is a required field.
Enter the person who will review and merge in the "Assignee" box. The assignee receives a notification when the user who added the pull request and the assignee are different.

Edit pull request
To edit a pull request, select the pull request on the Pull requests page, go to its detail page and click "Edit".
The target branch (the base branch) and the pull request branch (the branch that will be merged) cannot be changed.

Comment on pull request
Similar to sending comment notification, you can send notifications to other users when posting comments on the pull requests.
Please note that replying to the emails from Backlog regarding the pull requests will not post the comment unlike the posting comments to the issues by replying to the emails.

Comments can be added to a specific code. Click the "Files" tab to show the codes and the plus button will appear when you mouse over a specific row. Enter your comment, such as what needs to be fixed, and select the users to send the notification, then click the "Submit" button.

Close pull request
Click the "Close" button to close without merging the codes that were pull requested.

Merge pull request
To merge the pull requested codes, click the "Merge" button on the pull request detail page.

If the code is going to conflict, a message will be shown and you cannot merge it on Backlog. Resolve the conflict and merge the pull request on another tool or command prompt. Alternatively you may push the resolved code and click the "Merge" button on Backlog.

Network chart
Commit's chronological progress, such as to which branch commit was done or when commit was done, will be shown in a chart. You can check the member who committed most recently or how the branch diverged in repository's status.

Git Webhook
Git Webhook is a feature to HTTP POST to the specified URL (server) when local repository is pushed to the Backlog's Git repository.

For example, Webhook can be used for the following purposes:
- to trigger CI build
- to update backup
- to apply the newest version to staging area
- to connect other external systems
These can be done by using CI server's polling or cron features, which will access Git repository regularly. In contrast with polling, which access the repository periodically and could cause the time lag between operation and push, Webhook will HTTP POST right after the push. Therefore the operation can be done immediately without any time lag.
Setting Webhook
Webhook can be set for each repository. Please refer the following pages to specify the URL to POST:
Note
Please make sure that the specified URL for Webhook is accessible from Backlog server. URL for the servers, such as the ones located in the intranet, that cannot be accessed from Backlog cannot be chosen. Similarly, private network IP addresses, such as "192.168.x.x", cannot be specified.
To fix the temporal Webhook receiver server's error (when you get HTTP status code 5xx after POST), please try again several times.
Information, such as commit and email address, will be sent as described below. To protect these information, please specify the HTTPS URL.
Data format
With Webhook, pushing data triggers to send to the information to specified URL in JSON format. “payload” is the only parameter of JSON data as shown below:
{
  "before": commit before push,
  "after": commit after push,
  "ref": reference
  "repository": {
    "url": URL of repository,
    "name": name of repository,
    "description": repository description,
  },
  "revisions": [{
    "id": commit's ID,
    "url": commit'sURL,
    "author": {
      "email": email address of the person who committed,
      "name": name of the person who committed
    },
    "message": commit message,
    "timestamp": time stamp,
    "added": [ added file ],
    "removed": [ deleted file],
    "modified": [ modified file ],
  }]
}
Sample data:
{
  "before": "5aef35982fb2d34e9d9d4502f6ede1072793222d",
  "after": "c0b8abaa6df37ea682454c25f2d602dffb5de6ed",
  "ref": "refs/heads/master"
  "repository": {
    "url": "https://demo.backlog.com/git/DORA/himitsu",
    "name": "himitsu",
    "description": "Repository about secret tools",
  },
  "revisions": [
    {
      "id": "8e82fe274af30adbb378785628db509da1c969d1",
      "url": "https://demo.backlog.com/git/DORA/himitsu/commit/8e82fe274af30adbb378785628db509da1c969d1",
      "author": {
        "email": "nobi@example.com",
        "name": "nobi"
      },
      "message": "Created a door to take you anywhere",
      "timestamp": "2013-04-01T14:57:17+09:00",
      "added": ["html/anywhere.html", "css/anywhere.css"]
    },
    {
      "id": "c0b8abaa6df37ea682454c25f2d602dffb5de6ed",
      "url": "https://demo.backlog.com/git/DORA/himitsu/commit/c0b8abaa6df37ea682454c25f2d602dffb5de6ed",
      "author": {
        "email": "gouda@example.com",
        "name": "gouda"
      },
      "message": "DORA-1 Bamboo helicopter is broken #fixed",
      "timestamp": "2013-04-01T18:22:10+09:00",
      "removed": ["html/take-copter.html"]
    },
  ],
}