Backlog Enterprise Installation Guide
Version 2.0.0
Introduction
This guide explains how to install Backlog Enterprise using Docker. Before starting the installation, make sure that the server and associated software meet system requirements.
System requirements
Server
Hardware
| Requirements | |
|---|---|
| Memory | 16 GB |
| Hard disk | 30GB Increase this depending on the amount of data, files, repository size, etc. you want to store in Backlog. |
| CPU | 2.4 GHz, 4 core |
OS
OS supported by Docker
(https://docs.docker.com/engine/install/)
Software
AWS CLI (Command Line Interface)
version 2.x
Docker
version 20.10.0 or higher
Middleware
Database
MySQL 5.7
SMTP server
An SMTP server that can send mail without SMTP authentication
Service usage requirements
Web browser
- Windows
- Microsoft Edge (latest version available)
- Mozilla Firefox (latest version available)
- Google Chrome (latest version available)
- Mac OSX
- Apple Safari (latest version available)
- Mozilla Firefox (latest version available)
- Google Chrome (latest version available)
Work procedure
Advance preparation
Prepare everything before starting your installation. Below, we’ll walk through an installation using Linux as an example.
Preparing SSL certificate
Backlog uses HTTPS. You’ll need:
- SSL certificate
- Private key file
Installing AWS CLI
Download the AWS CLI installer, and install.
curl "https://awscli.amazonaws.com/awscli-exe-linux-x86_64.zip" -o "awscliv2.zip"
unzip awscliv2.zip
sudo ./aws/install
For more information on installing the AWS CLI, refer to the official AWS guide.
Installing Docker
Set up the yum repository, and install Docker.
sudo yum install -y yum-utils
sudo yum-config-manager \
    --add-repo \
    https://download.docker.com/linux/centos/docker-ce.repo
sudo yum install docker-ce docker-ce-cli containerd.io docker-buildx-plugin docker-compose-plugin
Set Docker to start up automatically.
sudo systemctl enable dockerStart up Docker.
sudo systemctl start dockerInstall Docker Compose.
sudo curl -L https://github.com/docker/compose/releases/download/v2.16.0/docker-compose-linux-x86_64 -o /usr/local/bin/docker-compose
sudo chmod +x /usr/local/bin/docker-compose
For more information on installing Docker:
Preparing database (MySQL)
Prepare a database (MySQL) to store the Backlog data. IaaS, such as Amazon RDS, is available, and MySQL can be installed on any server including the one where Backlog is installed.
Add the following settings to my.cnf:
[mysqld]
max_allowed_packet = 16M
character-set-server=utf8mb4
sql_mode = "NO_ENGINE_SUBSTITUTION"

[mysql]
default-character-set=utf8mb4

[client]
default-character-set=utf8mb4
Preparing SMTP server
Prepare an SMTP server to send emails from Backlog. SMTP servers installed by default on Red Hat Enterprise Linux and CentOS, such as Sendmail and Postfix, can send email without SMTP authentication.
Installation
- Creating a database
- Placing the SSL certificate
- Running the configuration tool
- Starting Backlog
Setting up the operating environment
Creating a database
Create a database name and user for Backlog. We recommend:
| Name | backlog |
| User | backlog |
Placing the SSL certificate
Place the SSL certificate and prepared private key file to any directory on the Backlog server.
mkdir “any directory”
cp “the SSL certificate” “the any directory”/crt.pem
cp “the private key file” “the any directory”/key.pem
Running the configuration tool
Download a Docker image of the configuration tool. Set AWS_ACCESS_KEY_ID and AWS_SECRET_ACCESS_KEY as environment variables copied from the Enterprise Account page.
export AWS_ACCESS_KEY_ID="XXXX"
export AWS_SECRET_ACCESS_KEY="XXXX"
Log in to Docker.
aws ecr get-login-password --region ap-northeast-1 | docker login --username AWS --password-stdin 019623933850.dkr.ecr.ap-northeast-1.amazonaws.comThen, run the configuration tool under a directory where Backlog will be installed.
For example, if the installation directory is backlog-enterprise:
mkdir backlog-enterprise
cd backlog-enterprise
docker run --rm -it -v $PWD:/work -v $PWD/data:/data 019623933850.dkr.ecr.ap-northeast-1.amazonaws.com/enterprise-bootstrap:2.0.0
The configuration is interactive. There are eight items to complete, and they should be done according to the environment in which Backlog will function.
Please enter the name of Backlog's database.
Default value: backlog
> backlog

Please enter the user name for connecting to the database.
Default value: backlog
> backlog

Please enter the password for connecting to the database.
>
Enter the database information created earlier.
Please enter your SMTP host name for sending email. Environment variables are also available.
[e.g.] backlog-smtp.example.com, 192.168.0.12
>
Enter the SMTP server information created earlier.
Please enter your time zone name.
[e.g.] Asia/Tokyo, America/New_York, Europe/London
>
Ensure the time zone name matches the time zones of other middleware such as a database server and an SMTP server.
Please enter the directory containing the SSL certificate.
>
Enter the “absolute” directory path created earlier.
Your installation is now complete.
Starting Backlog
Start Backlog with the following command:
docker compose up -dIf you need to stop Backlog, use the following command:
docker compose downInitial setup
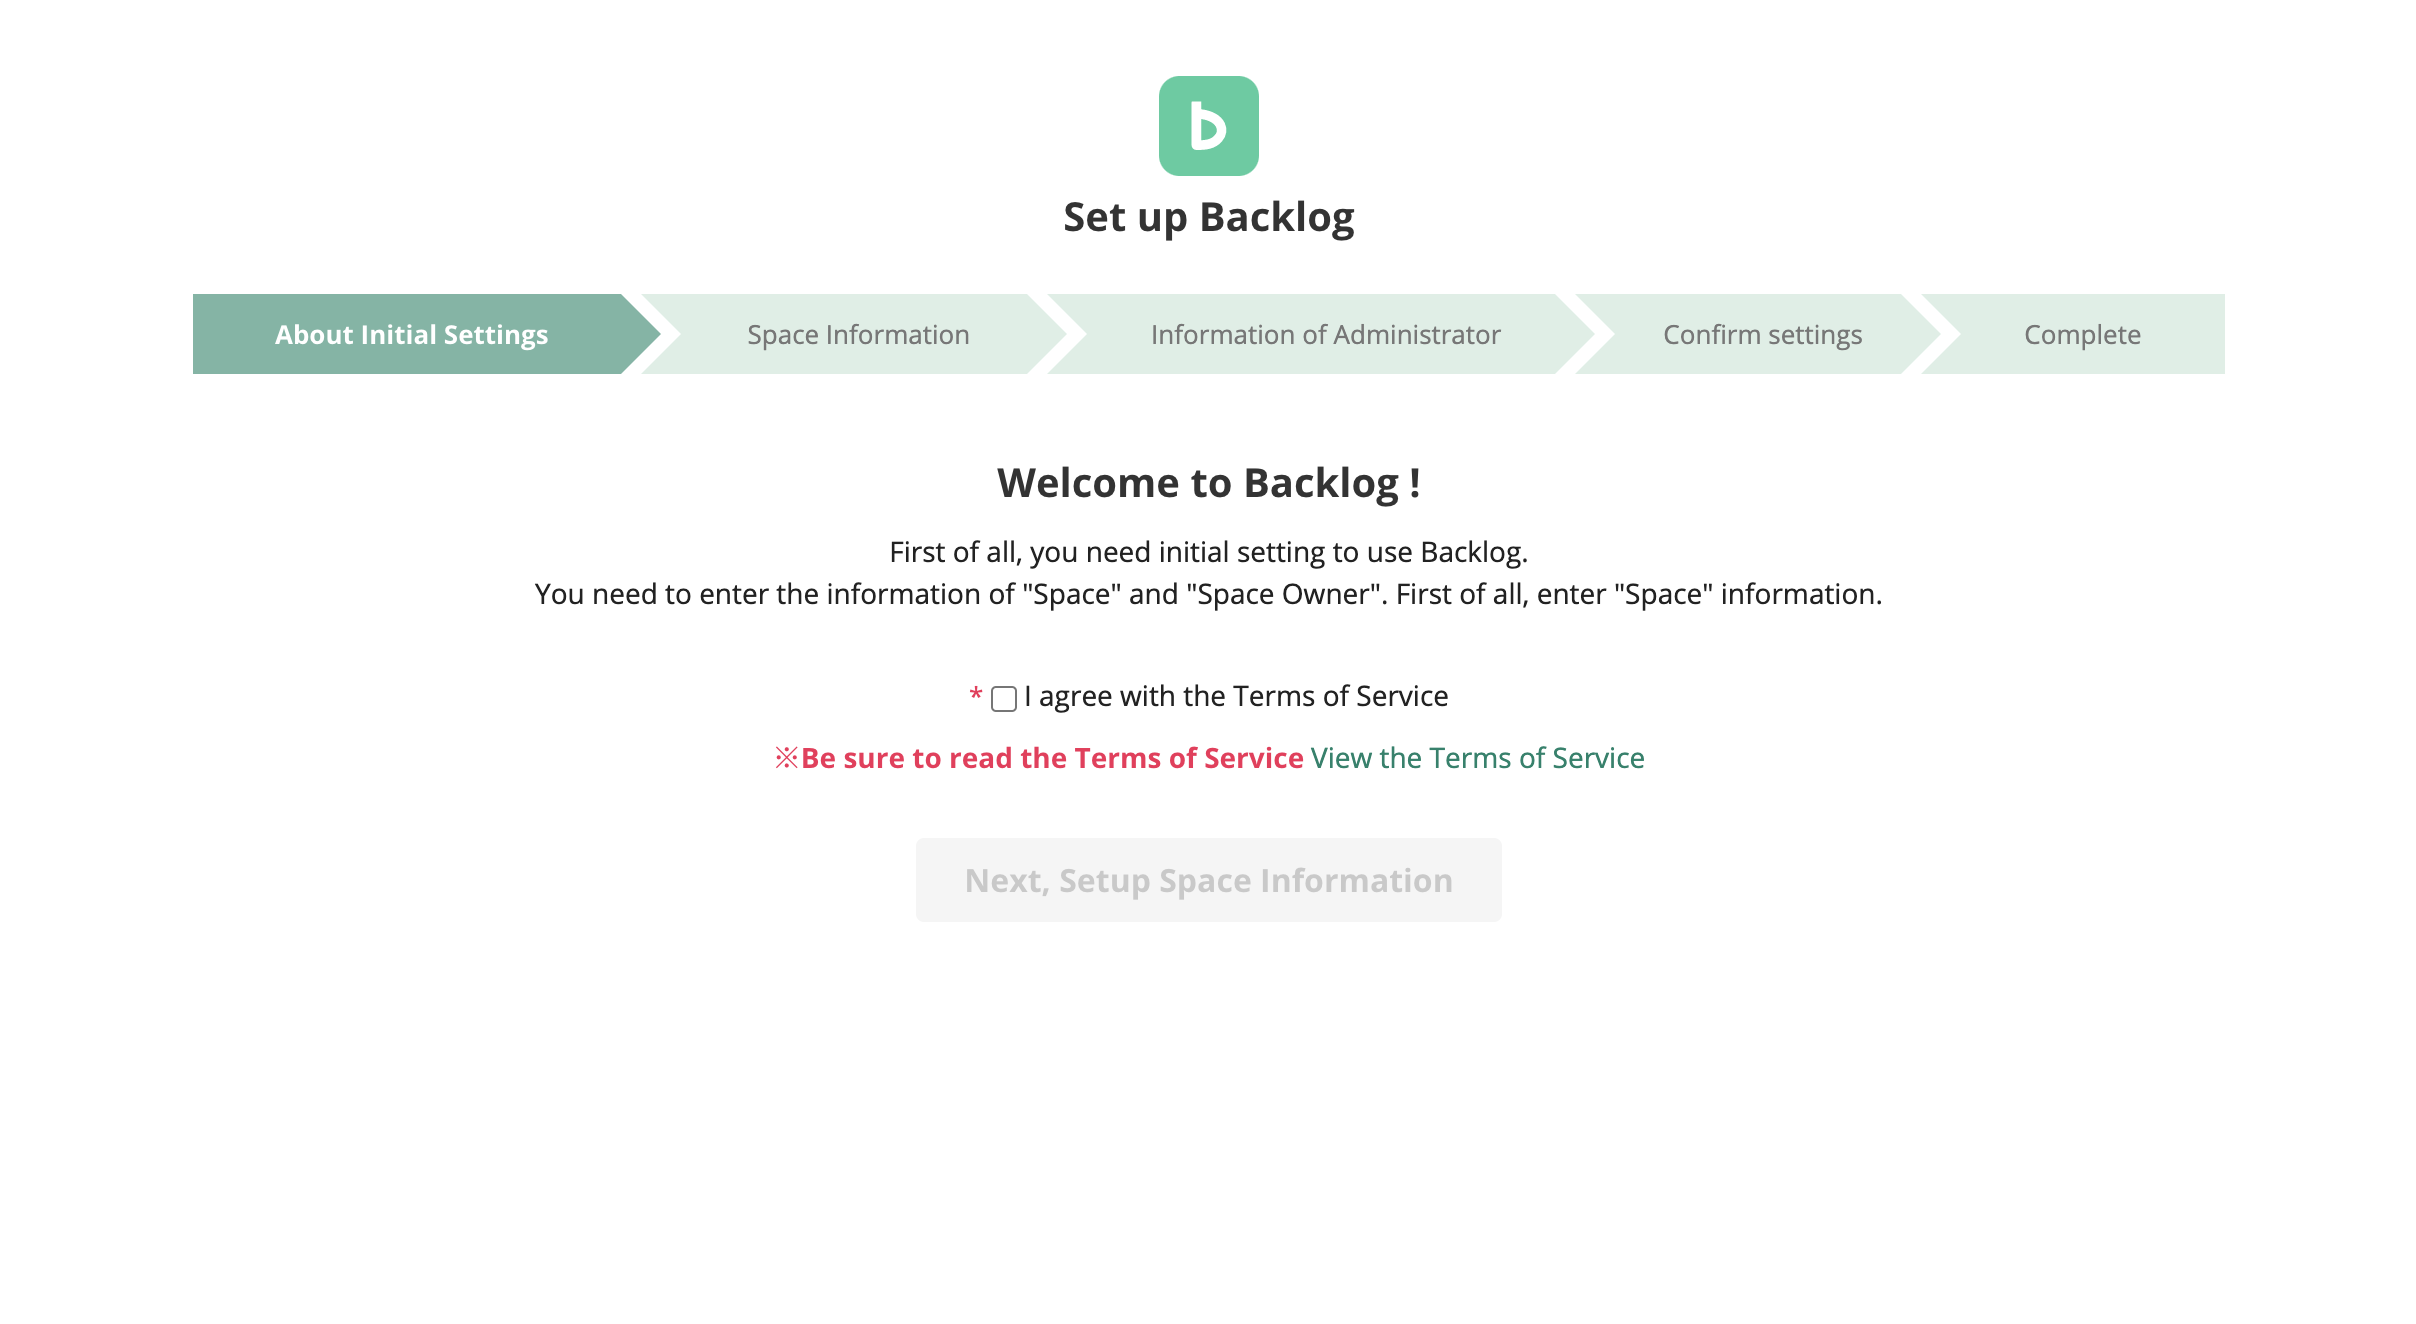
Register your license key and administrator information at the following:https://[host name]/backlog/Setup.action
Read and accept the Terms of Service to continue.
Entering space information
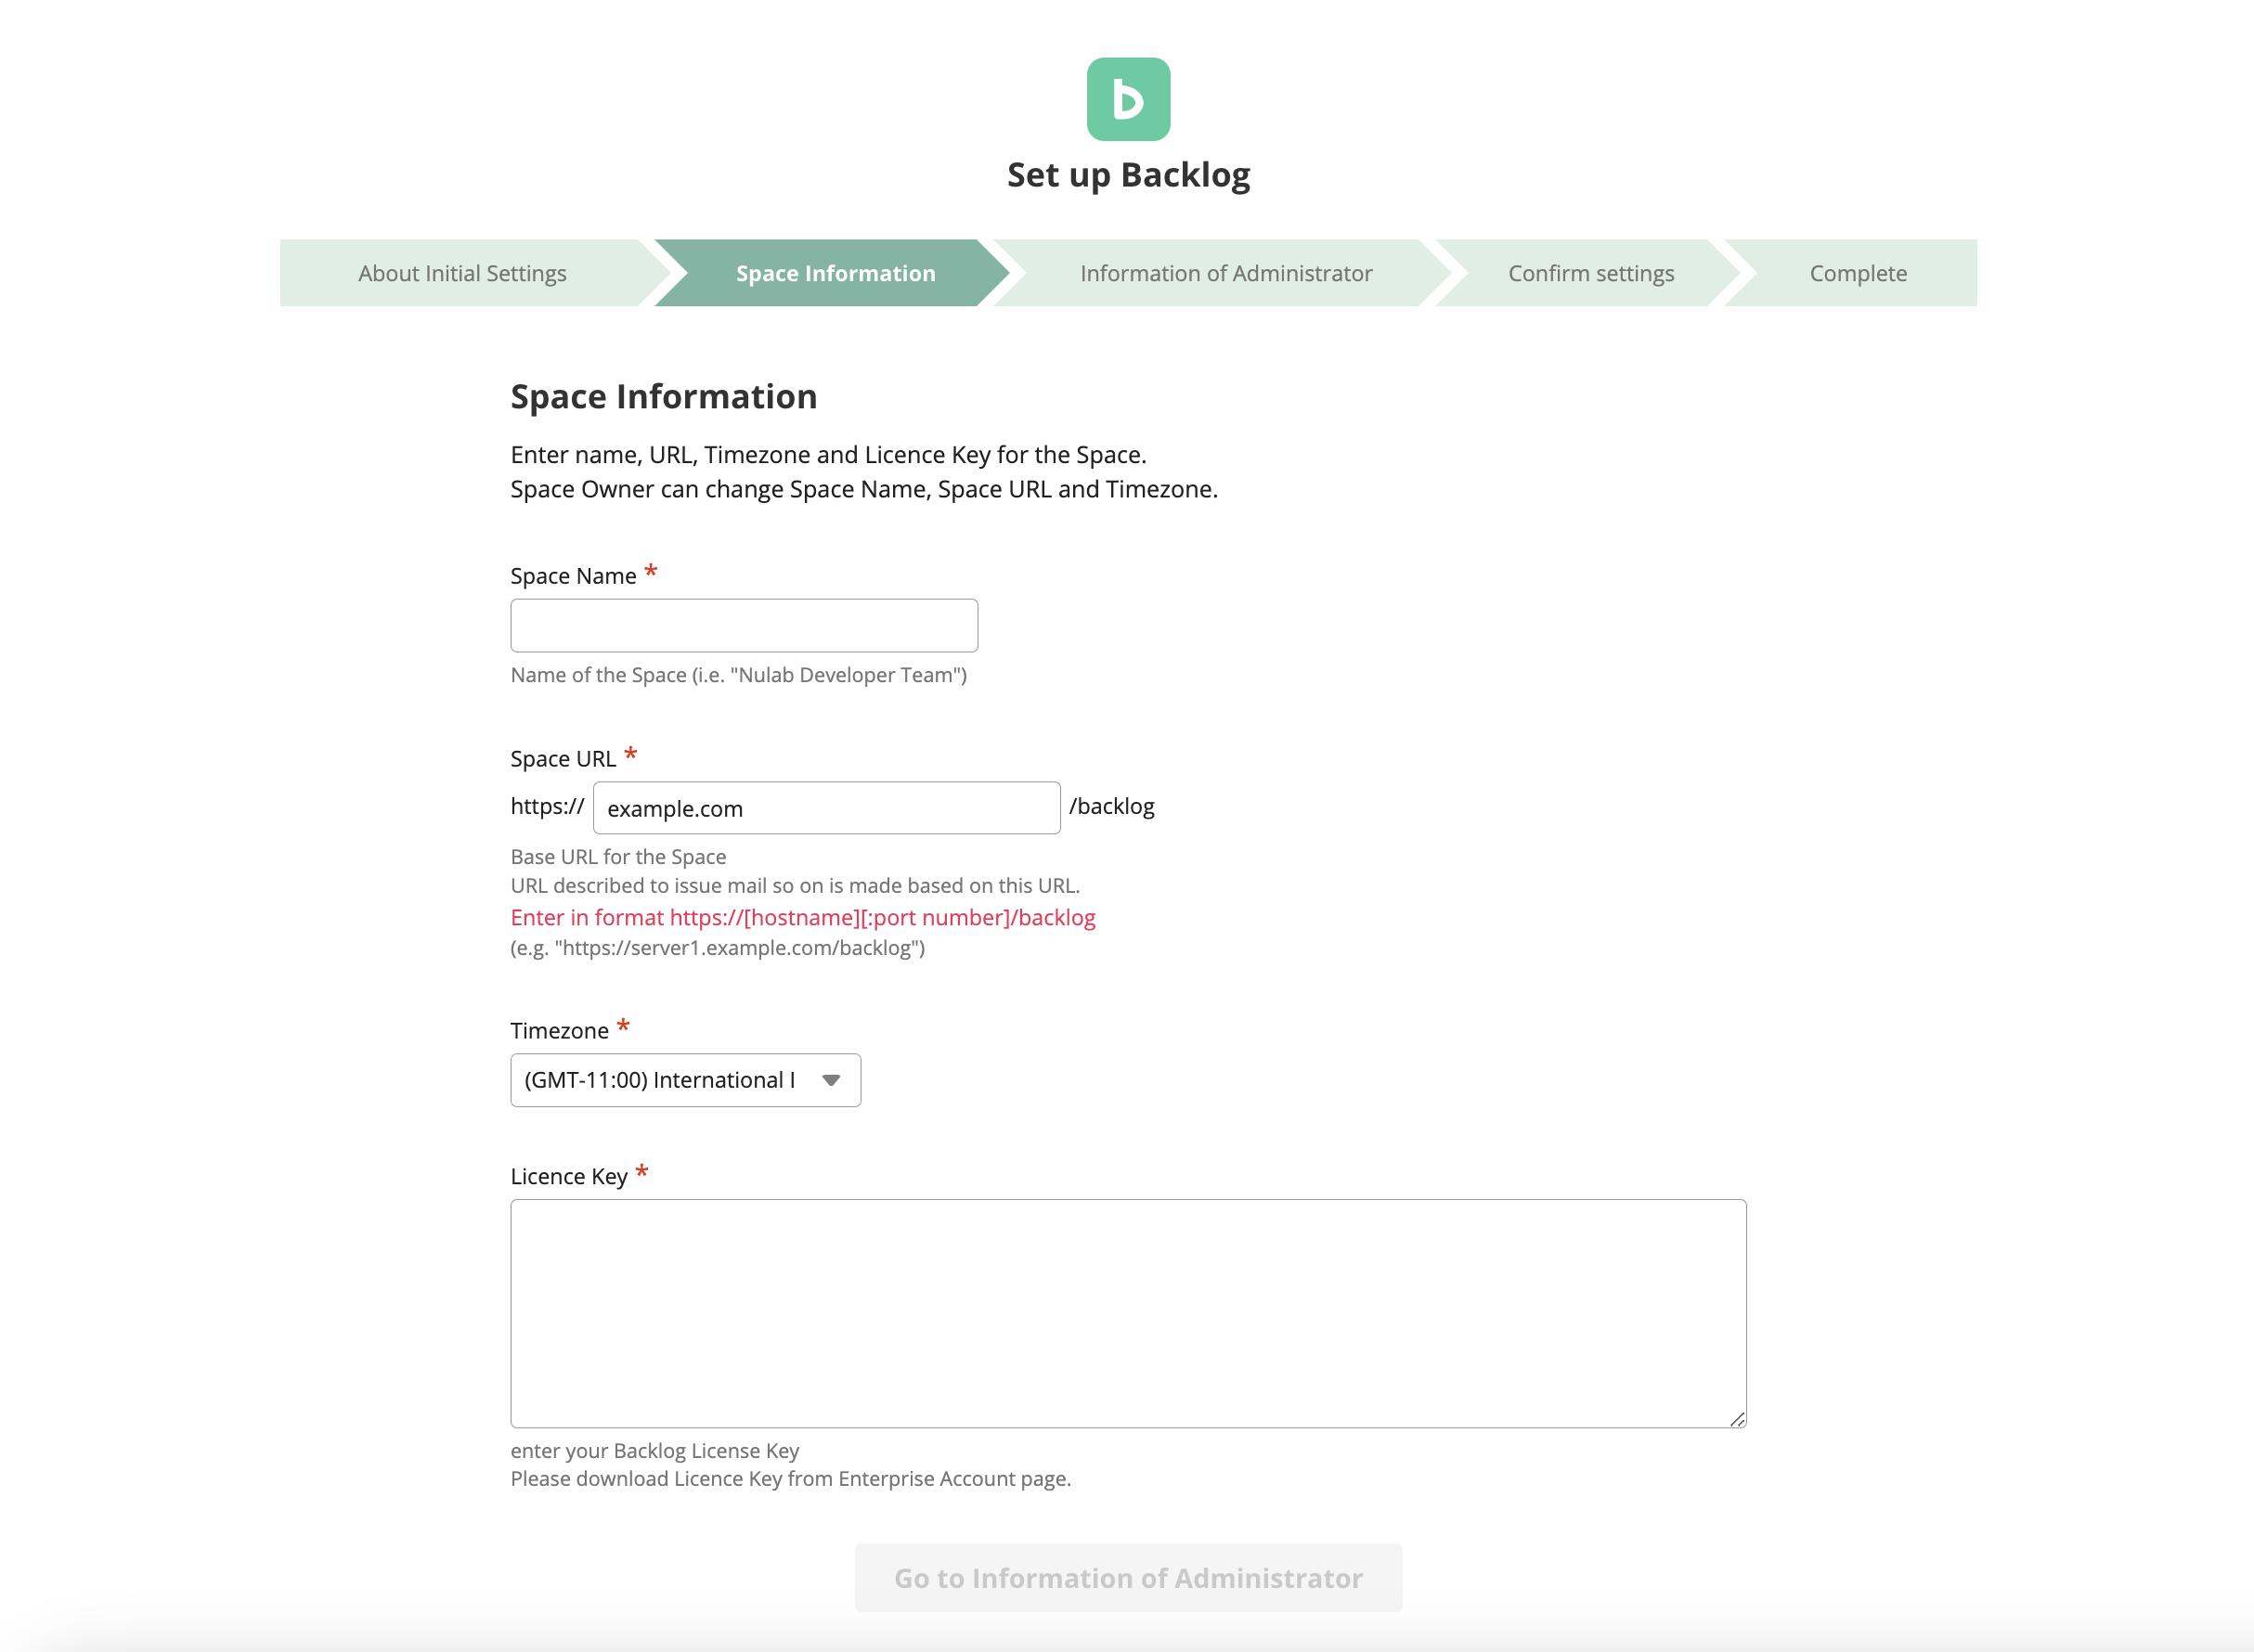
Enter your Backlog space name, space URL, and license key.
- Space name: This is the name that will be displayed at the top of your login and dashboard.
- Space URL: This is the URL you’ll use to access Backlog and is also used to create URLs for issue emails, etc.
- License key: This is the license key displayed on the Enterprise Account page.
Entering administrator information
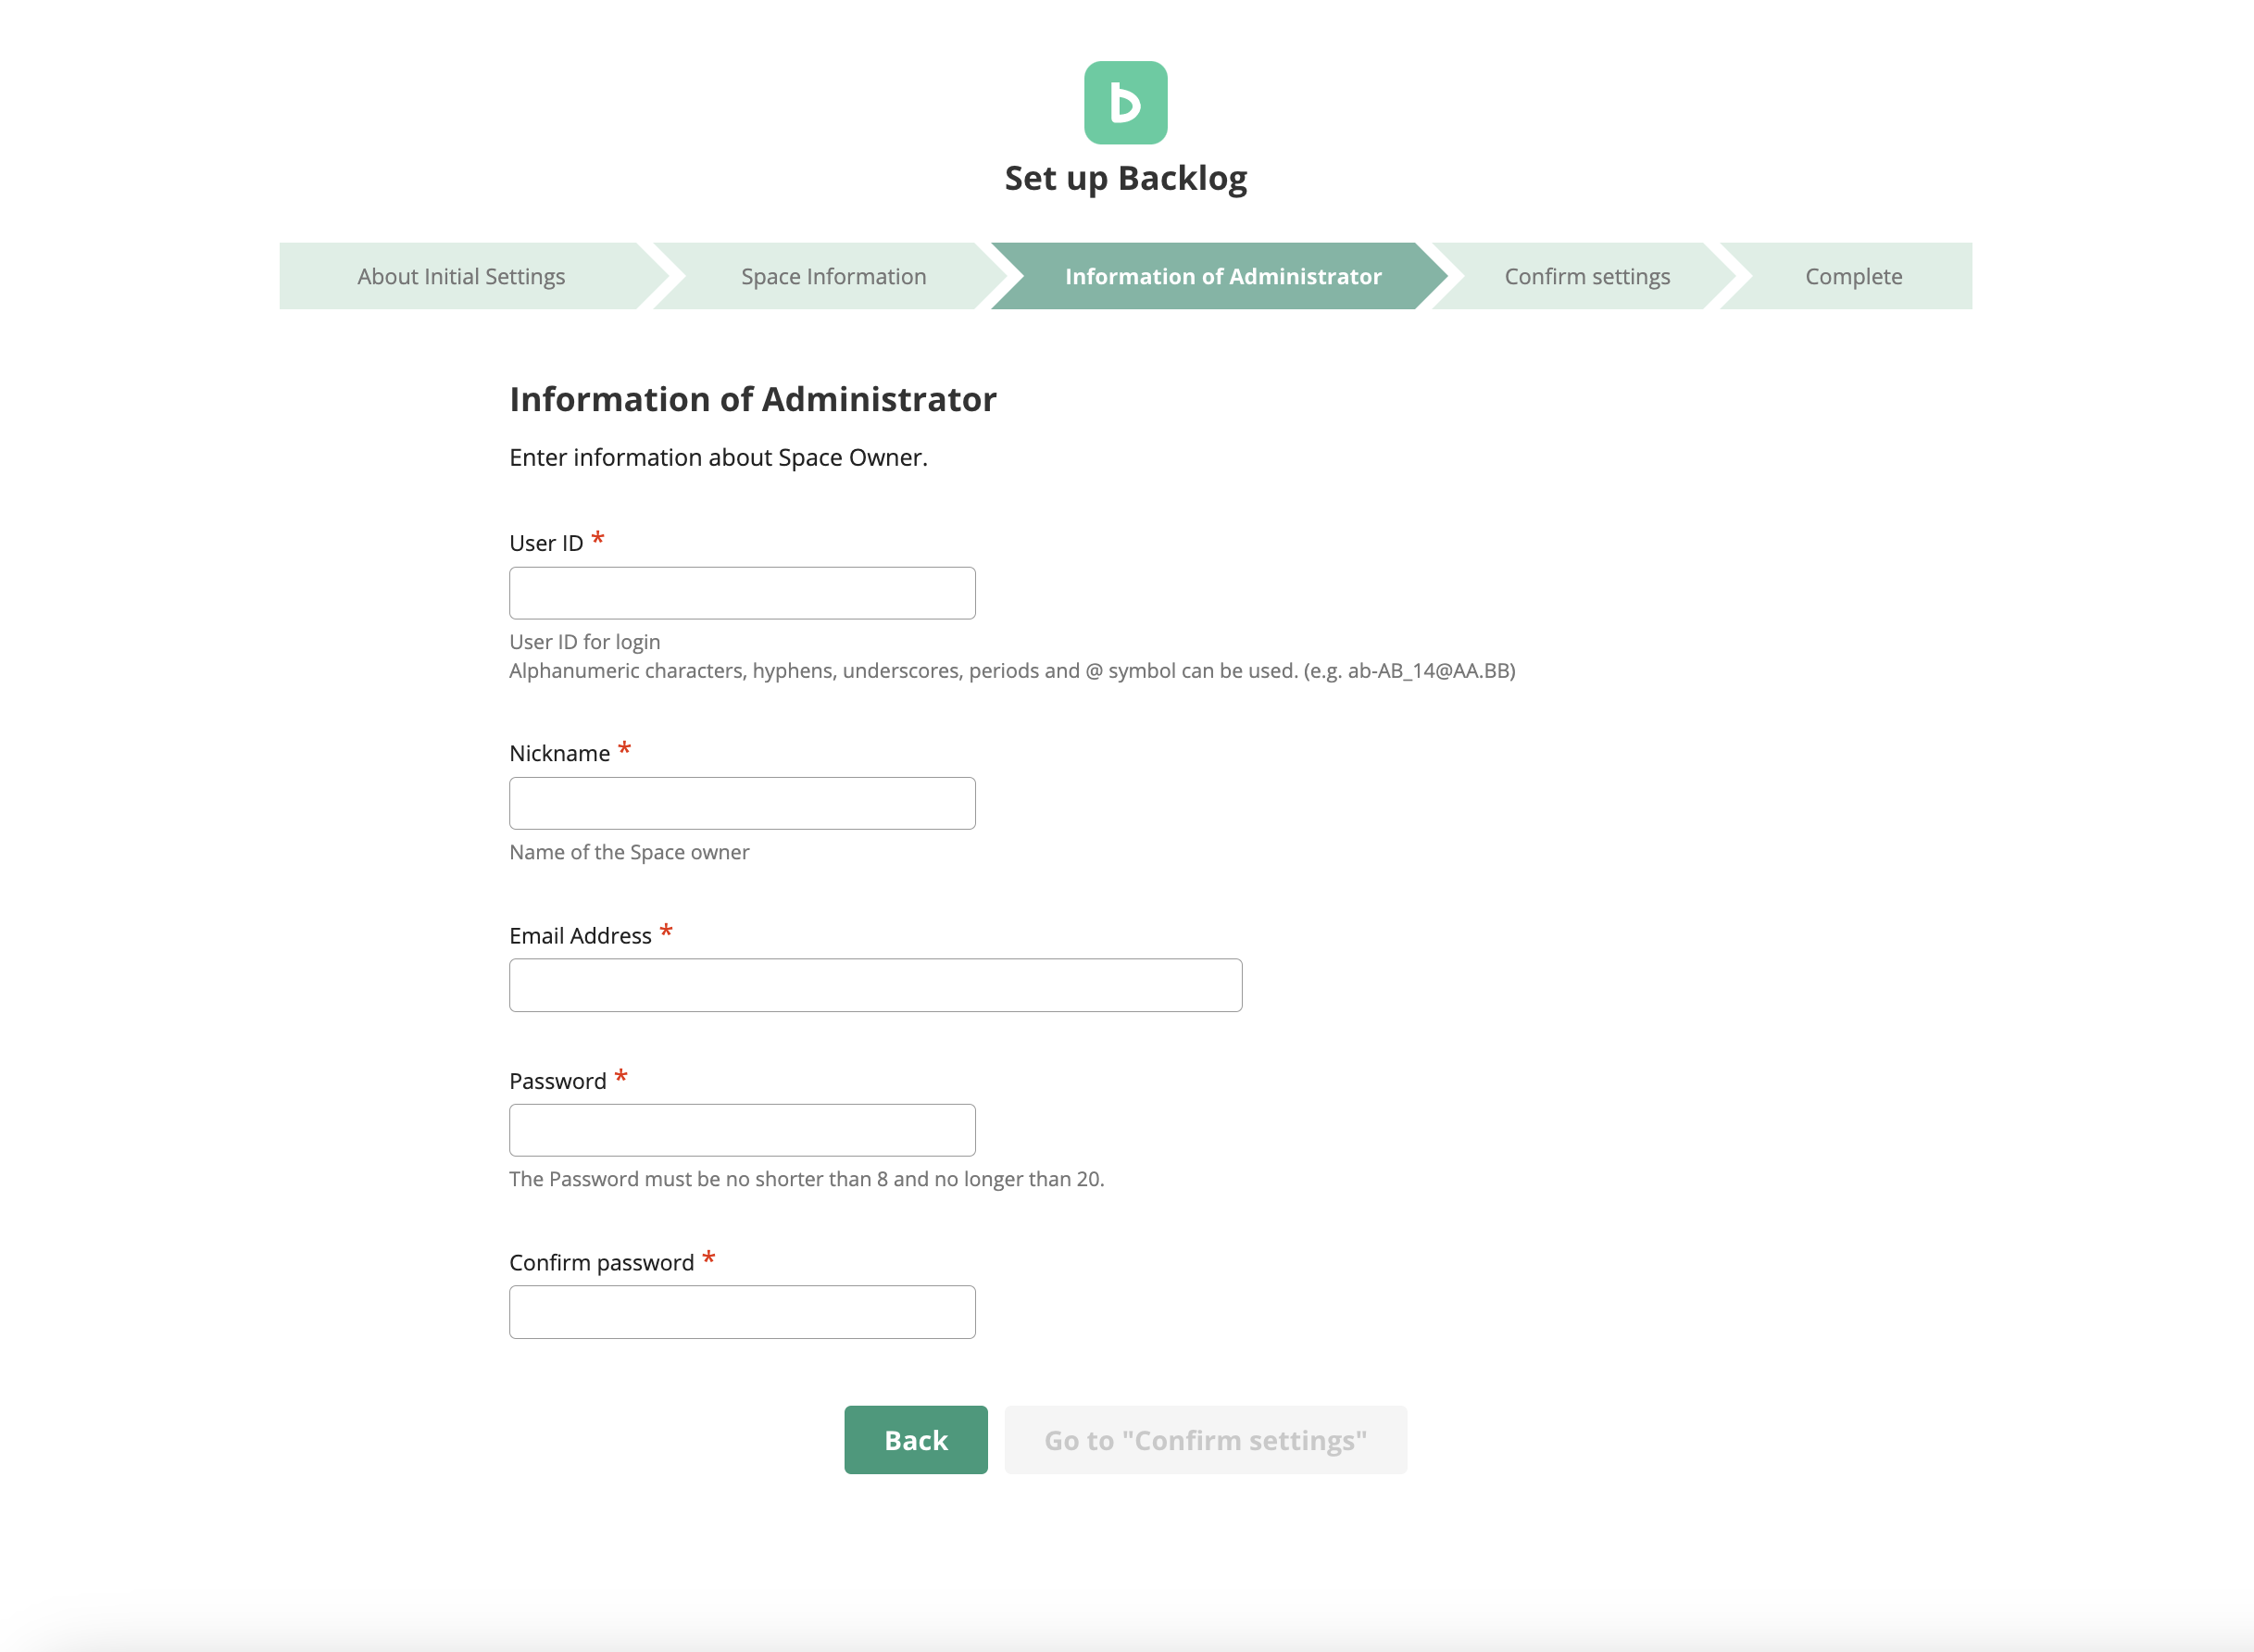
Assign a space owner who’ll manage your Backlog space. In addition to the privileges available to standard administrators, the space owner can:
- Edit access restrictions
- Change the license key
- Change the space owner
Completing setup
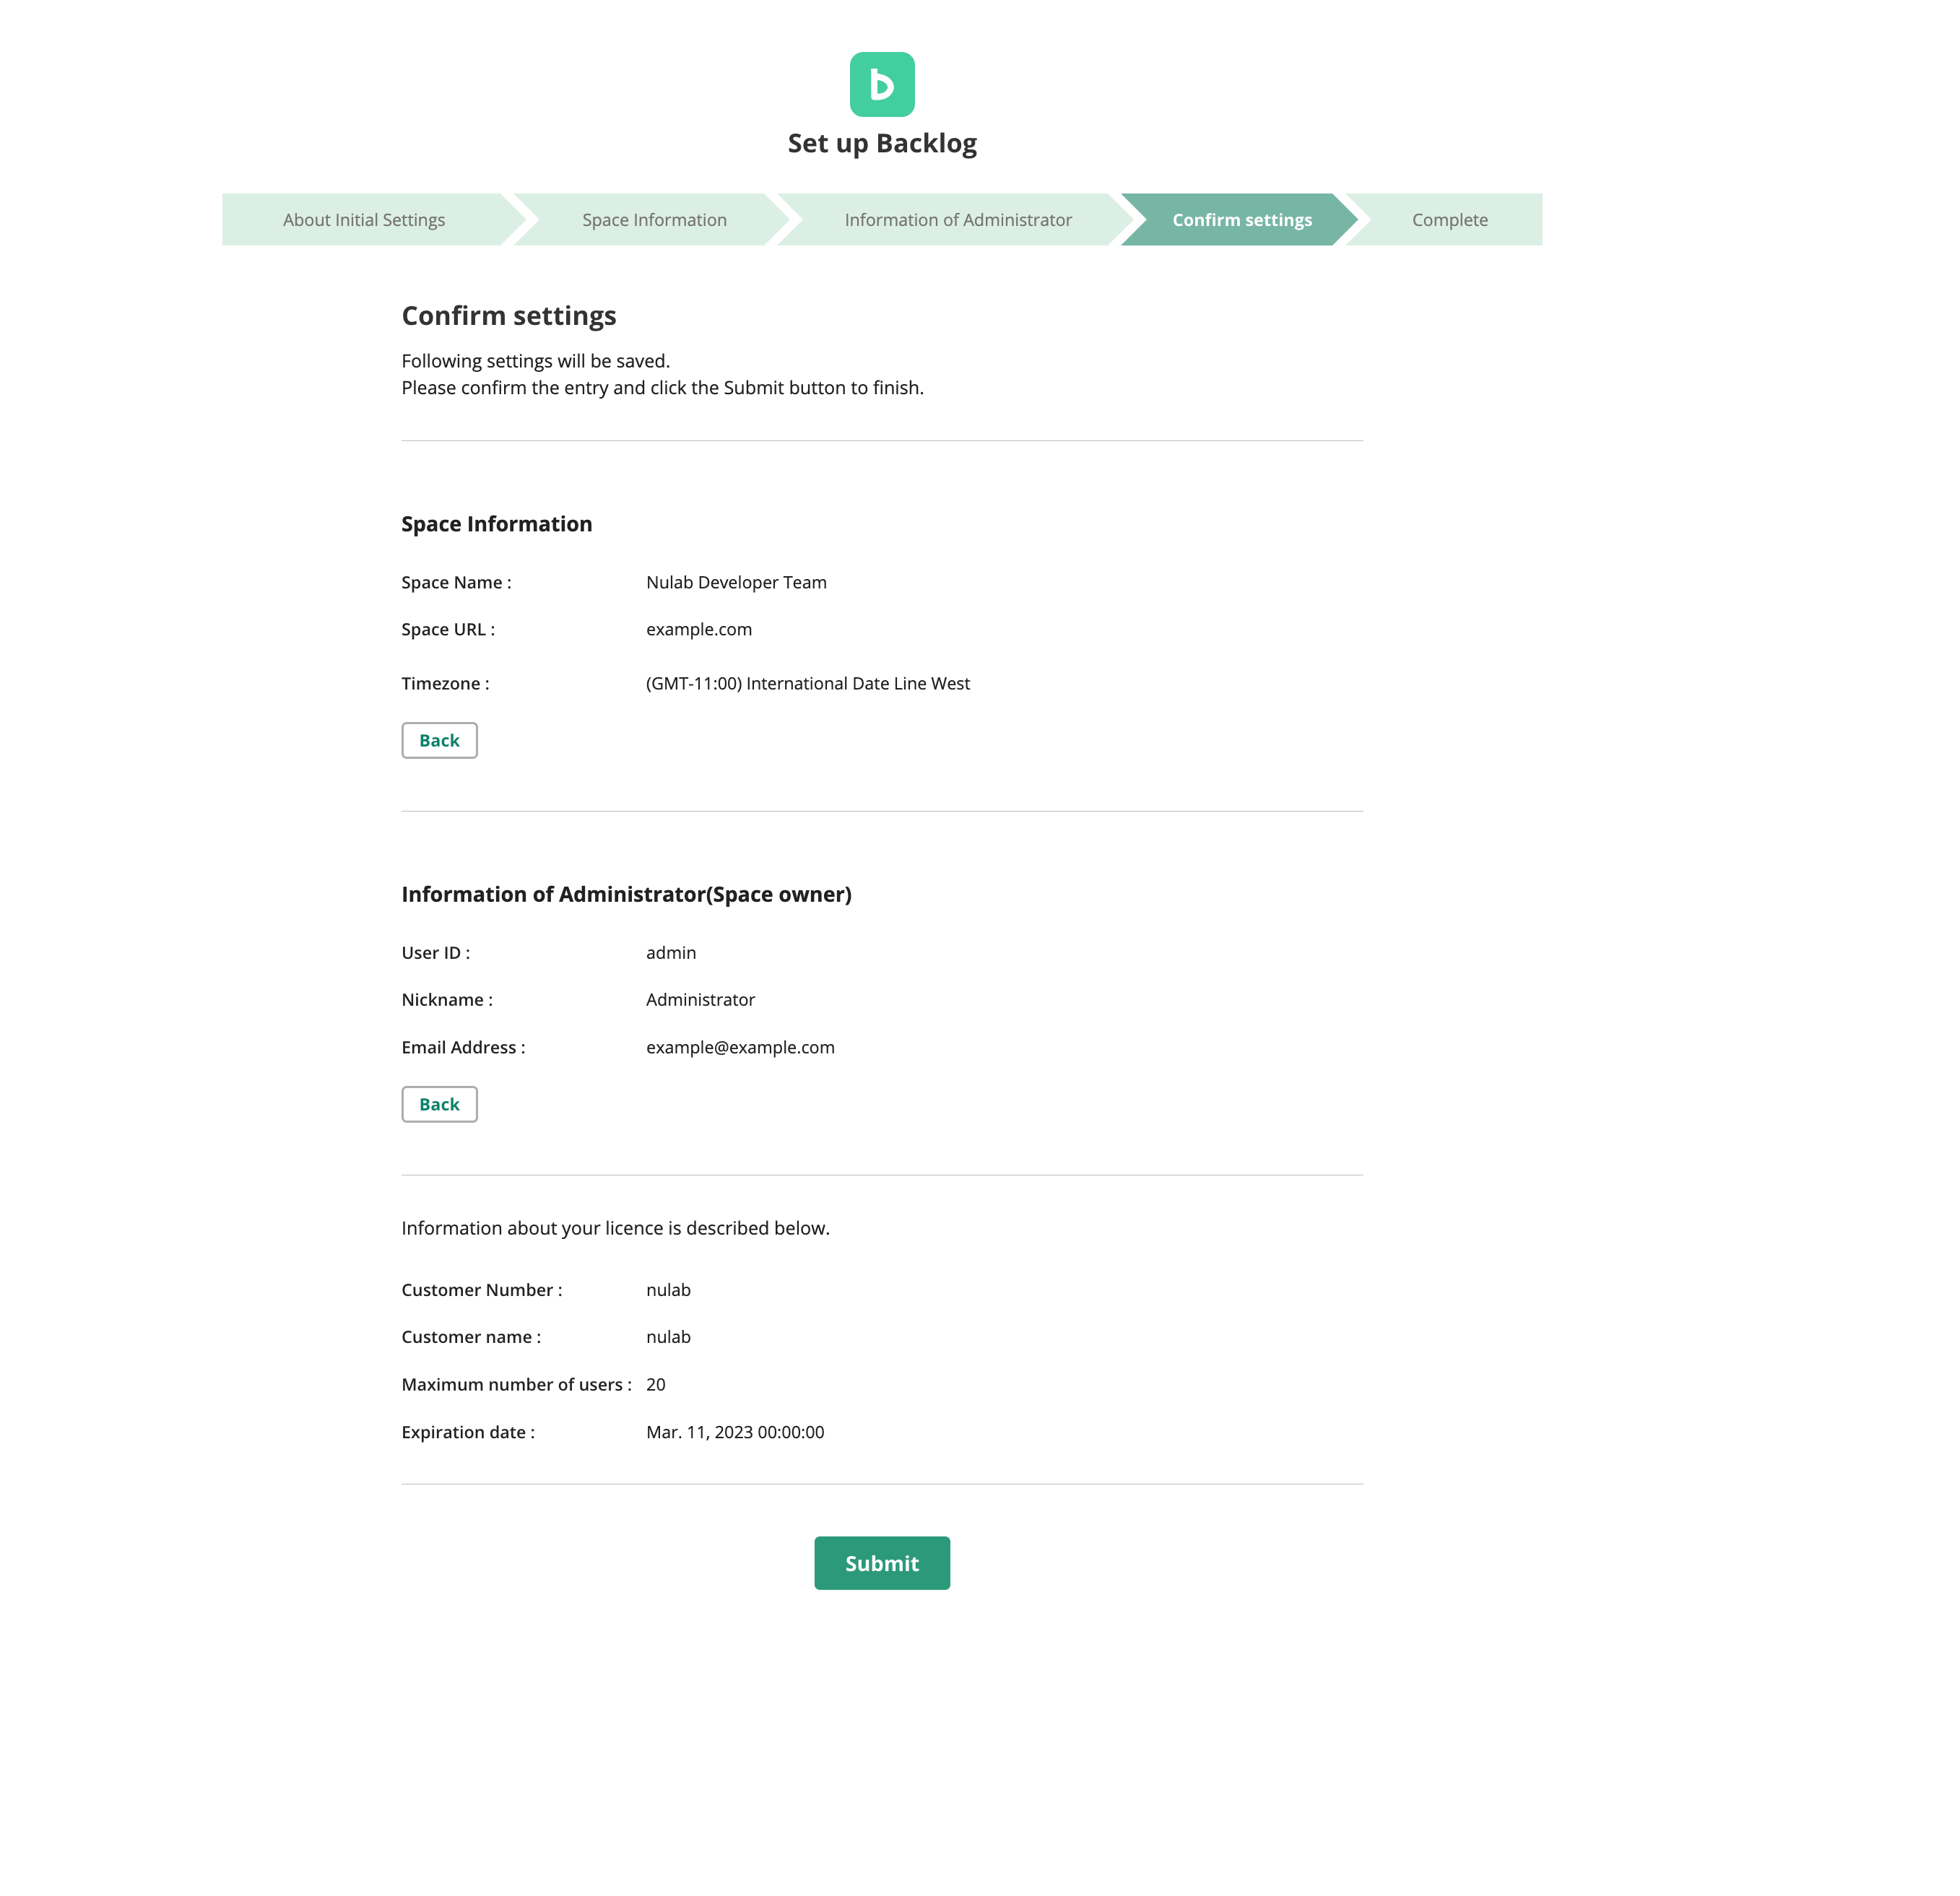
Review and submit your space and license information.
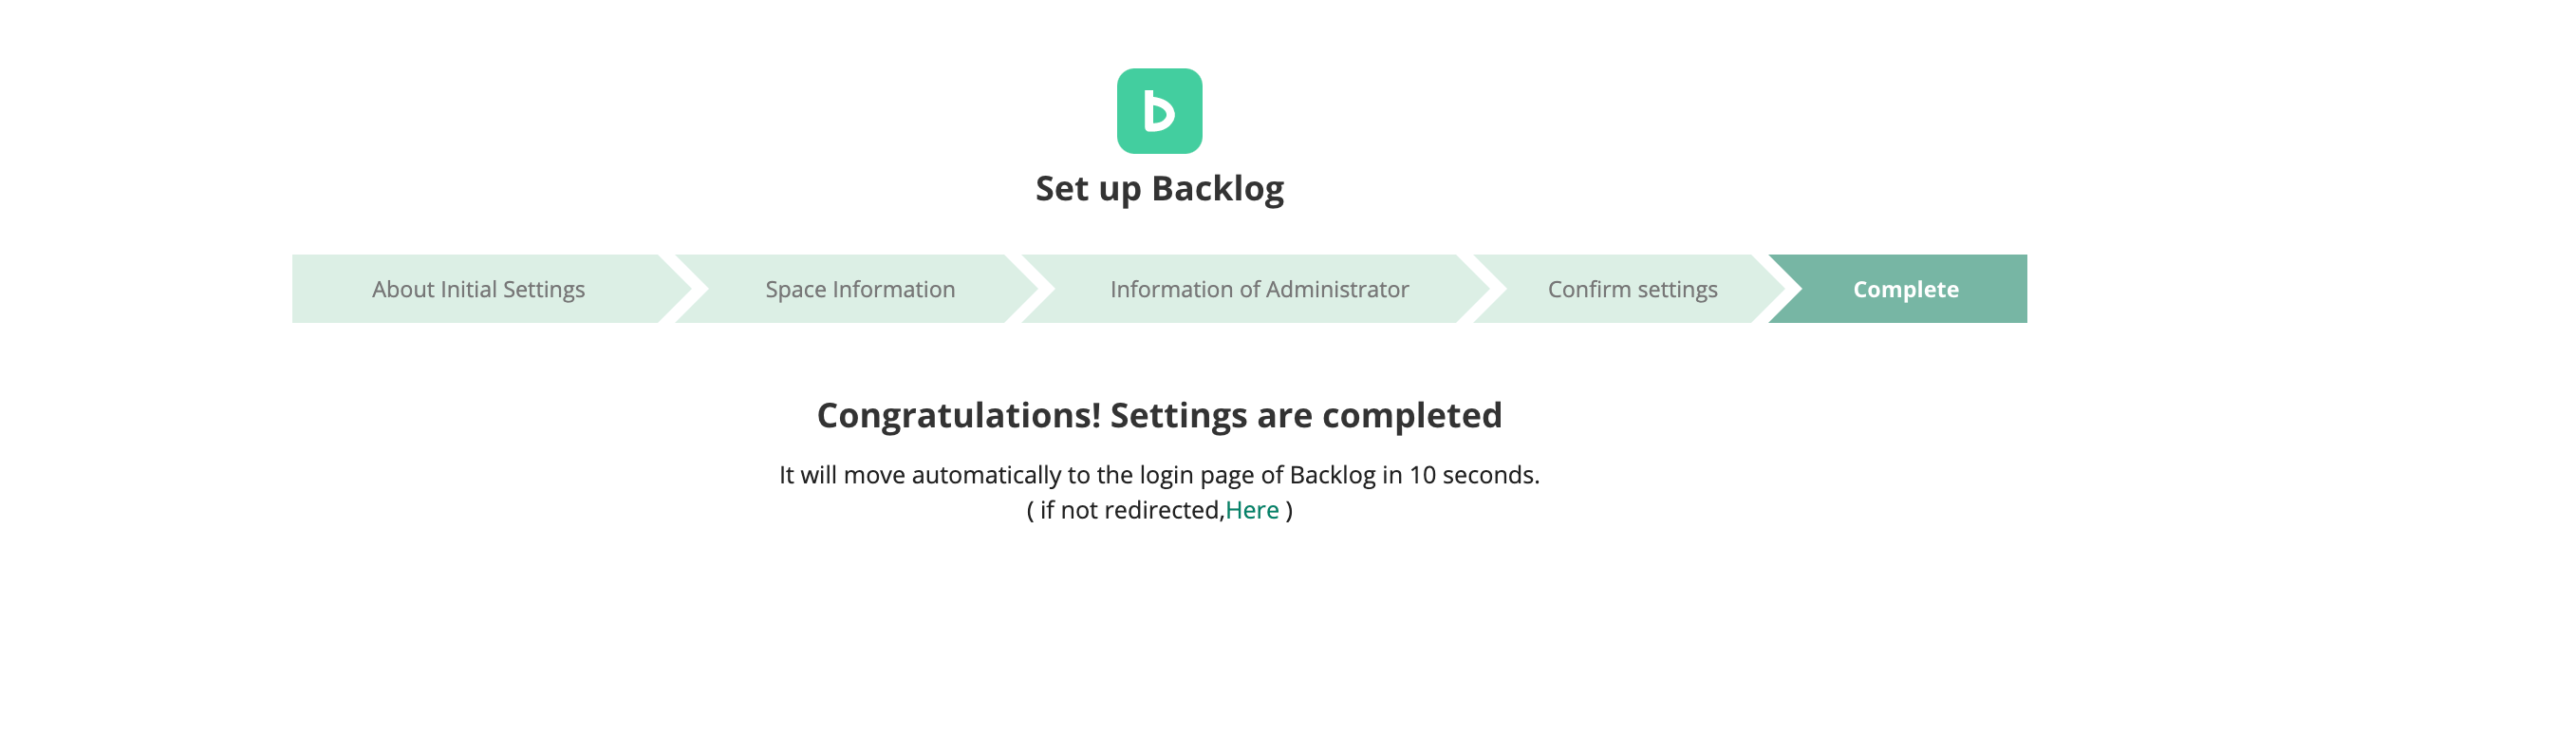
Setup is now complete, and you’ll be automatically redirected to the Backlog login screen.
After initial setup
About the trademark
- MySQL and Java are registered trademarks of Oracle and/or its affiliates. Other names may be trademarks of their respective owners.
- Docker is a trademark or a registered trademark of Docker, Inc. in the United States and/or other countries.
- Amazon Web Services, AWS, and AWS CLI (Command Line Interface) are trademarks of Amazon.com, Inc. or its affiliates.
- Linux® is the registered trademark of Linus Torvalds in the U.S. and other countries.
- Red Hat Enterprise Linux is a trademark or a registered trademark of Red Hat Inc. in the United States and other countries.
- Other company and product names in this document may be trademarks or registered trademarks of their respective owners.