推送到远程存储库
让我们推送到您在本教程的开头时创建的本地存储库。
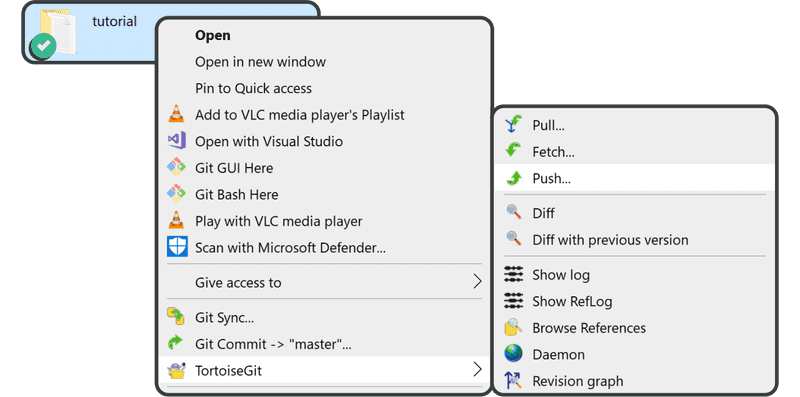
右键单击“tutorial”目录,然后单击“Push”。
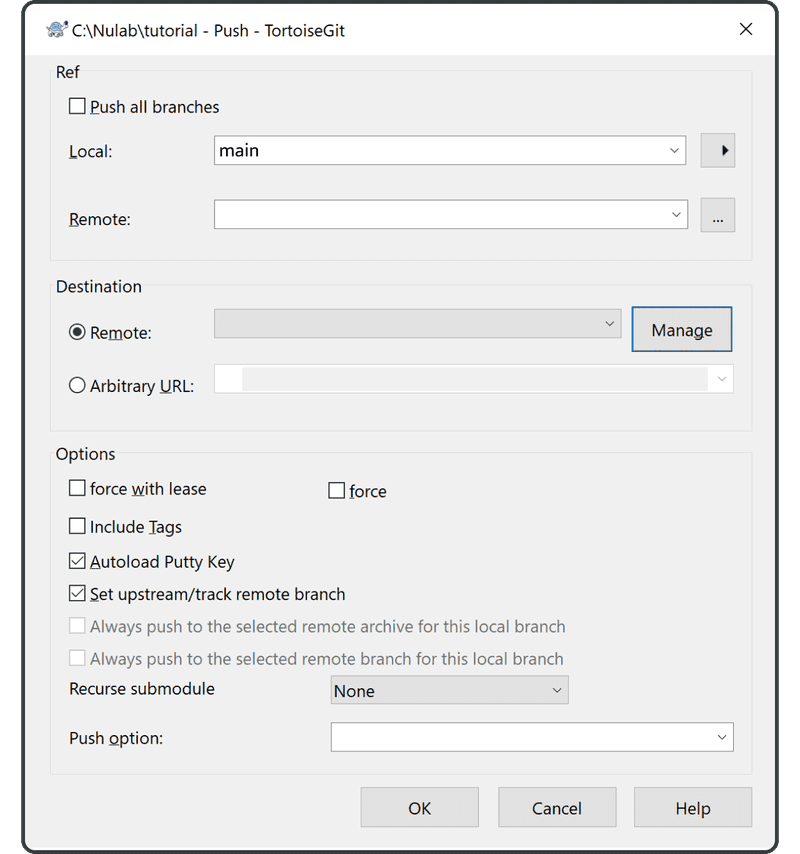
点击“Manage”。
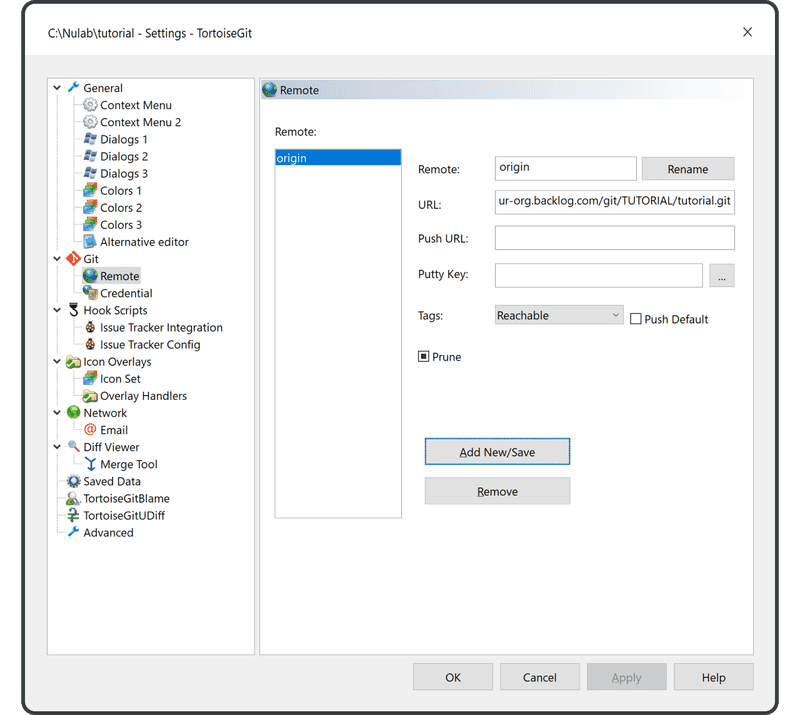
输入以下内容:
- 远程:“origin”
- URL:您之前在 Backlog 中创建的远程存储库的 URL
单击“Add New/Save”,“origin”现在将对应于远程存储库 URL。
单击“OK”结束。
如果您在控制台上,如果您在推送/拉取时省略了远程名称,在默认情况下将会使用“origin”远程存储库。这是因为惯例通常使用“origin”作为远程名称。
在 Push 屏幕上选择“origin”作为 Remote 项,然后单击“OK”。
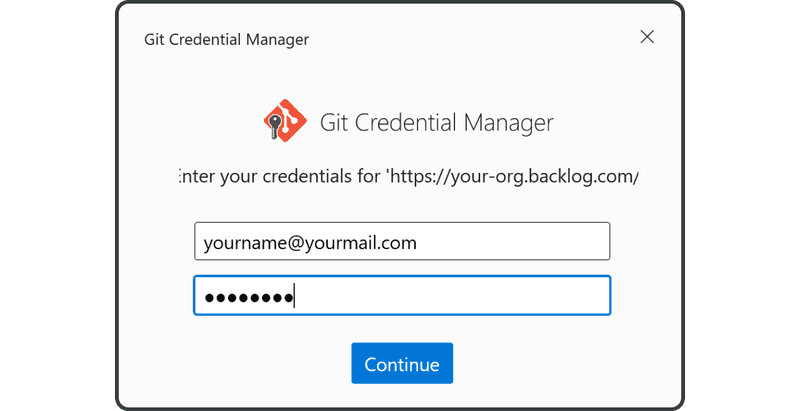
输入您 Backlog 的电子邮件和密码。然后点击“continue”。
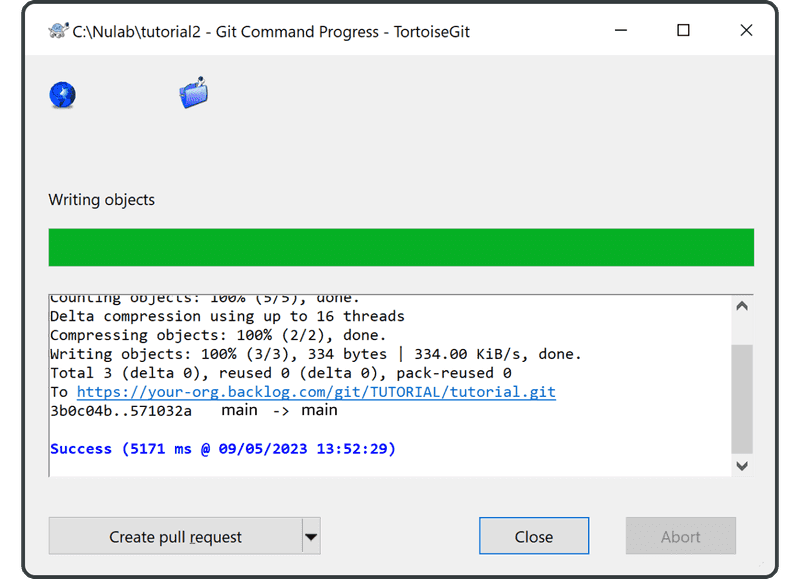
成功完成推送后,您将看到下面屏幕。
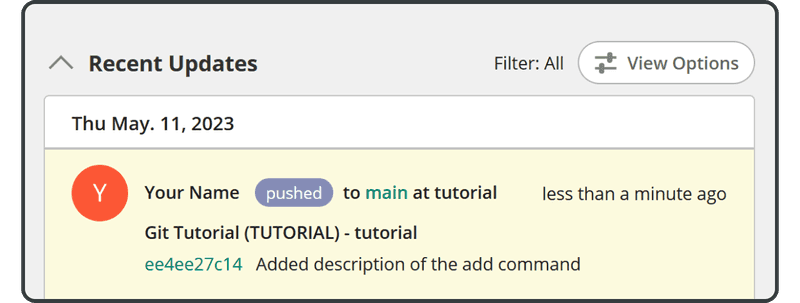
打开 Backlog 上的 Git 页面,您会发现在“Recent Updates”下面,列出了一个与您推送到远程存储库相对应的最新更新。
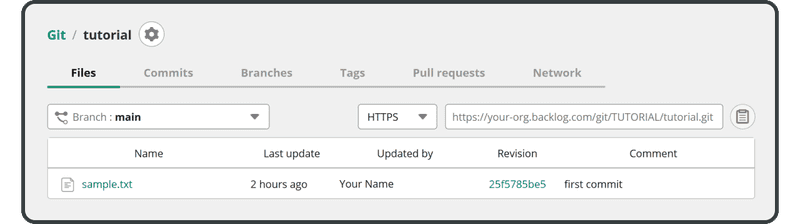
推送的文件也会出现在远程存储库的文件列表中。
接下来,我们将克隆这个远程存储库。