
Every startup experiences growing pains as it progresses through the various stages of its growth journey.
Teams are constantly expanding, often doubling or tripling in size in a matter of months. Your goals frequently change to account for shifting market conditions and customer expectations. And your codebase is a constant work in progress as development teams continually release new products and features while managing bugs.
With so much going on, it can be challenging to keep things on track. That’s where a comprehensive approach to project management, supported by project management software built for startups, comes in.
Why do startups need project management software?
Every single project contributes to whether your startup sinks or swims. Whether you’re a founder or an early employee, we bet you have ambitious goals and are optimistic about what the future holds. Achieving those goals demands a relentless focus on execution, and great execution demands great project management.
That’s why project management software is critical in helping startups scale efficiently. With the right project management software, your team will be well-positioned to scale operations and manage growth without sacrificing quality.
We’ll share how Backlog, our project management software designed for startups, can support your startup as it scales. We’ll explore how you can use Backlog to manage projects, supervise code quality, and work together closely across different departments. But first, let’s answer one key question: what is Backlog?
Introducing Backlog: project management software built for startups
Backlog is a project management tool that serves as the central hub for all your team’s work. Teams use Backlog to organize, discuss, and track various projects, using an impressive range of features to assign tasks, work together, and report on their progress.
For startups, the scalable, cloud-based architecture of Backlog is the perfect solution. It’s an affordable project management tool for growing companies that comes with a variety of features to increase the efficiency of your team’s workflow.
Popular features include:
- Task management: teams use Backlog to assign tasks, manage deliverables, and track project progress.
- Collaboration: team members can exchange comments, review code together, and access shared resources in file libraries and project wikis.
- Version control: manage your code alongside project work with Backlog’s built-in version control tools, including private repos, inline discussions, a difference viewer, and more.
- Bug tracking: automatically create and assign issues, work on remediations directly in Backlog, and tag teammates for review before merging new branches.
- Reporting: quantify the progress of your projects with visual displays, including Gantt charts, kanban boards, and burndown charts.
- Integrations: Backlog slots seamlessly into your startup’s existing workflows with integrations to platforms like Slack, Microsoft Teams, Google Drive, and more.
We’ll walk you through how to use several of these features to take a more efficient approach to managing your team’s projects. If you’d like, you can sign up for a free Backlog account and follow along (no credit card required!).
By the time you finish this article, you won’t just know the steps you need to take; you’ll have an efficient project management process completely set up.
How to set up and manage projects in Backlog
Backlog is renowned for being a project management software that anyone can use. While there are plenty of powerful features for software development teams, the platform is equally valuable to non-technical teams thanks to its intuitive user interface.
Getting started with Backlog is simple. Below, we explore the four key steps you and your team need to master to embrace a more efficient project management process.
Step 1: Creating and organizing projects in Backlog
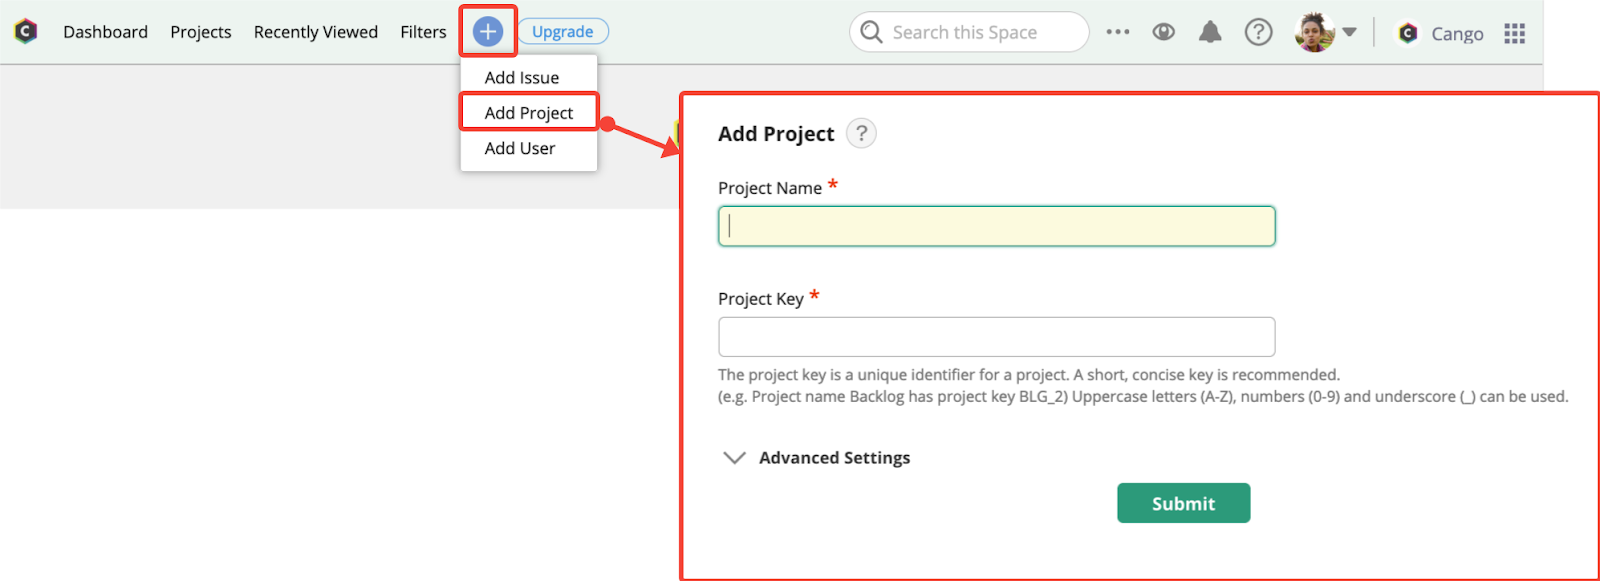
To create your first project, log in to Backlog and click the + icon in your Backlog dashboard. Select Add Project, and then give your project a name and a project key: a short descriptor that acts as a code for the project.
For example, let’s say you’re setting up a project to handle the redesign of your startup’s website. You might call the project “Web Redesign 2024” and use the project key “WEBDES24”. Toggle the Advanced Settings option and enable all attributes and functionality. Click the Submit button to set up the project.
Next, it’s time to enter the specific details about the project your team needs to know. A good place to start is by adding any project resources your team needs to an internal project wiki, a centralized repository that contains all critical project information. For our hypothetical web design project, you might add your brand guidelines, any proposed designs, a link to a library of brand assets, and so on.
At this stage, you should also create milestones: major points in the project that help track progress. Example milestones for the website redesign project may include:
- Sitemap finalized
- Low-fidelity wireframes approved
- Copywriting and graphic design complete
- Staging site complete
- Testing complete
- Launch
Assign deadlines to each of your milestones, working backward from the project’s due date to ensure enough time for each stage of the project. These milestones will be important in the next stage: adding and assigning tasks to your team.
Step 2: Adding and assigning tasks in Backlog
You can use Backlog as an individual, but the platform is best suited for teams – particularly small but mighty startup teams.
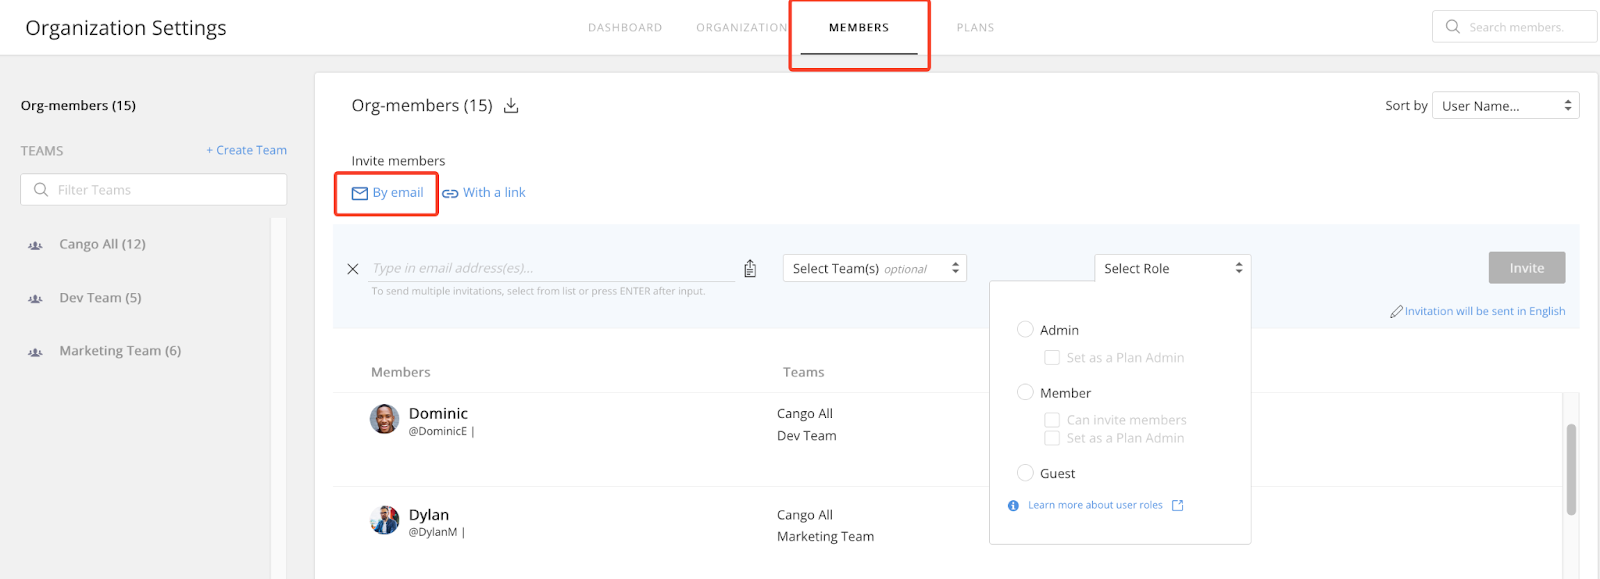
You can add as many team members as you like to Backlog projects. Administrators can add new users by navigating Organization Settings and clicking the Members tab. New users are sent an email invitation. Administrators can specify new users’ projects, teams, and privilege levels.
Once you’ve invited your team to Backlog, it’s time to set up the tasks you’d like them to work on and start assigning your employees their work.
To add a task, select the + icon in your Backlog dashboard and then click Add Issue. A task card will open. Input the details your team needs to know to complete their work successfully. You don’t need to fill in every field, but the more information you provide your team, the more efficiently they can work.
You can add files, links, and a variety of other information, including the task’s priority level and the due date for completion. Each task should be mapped to a specific milestone. Once you’ve entered all the relevant information, assign the task to the appropriate team member. You can also create custom fields.

More complex tasks can be broken down into a series of sub-tasks, which are nested under a larger task. This is helpful for more complex tasks that might involve several discrete stages or need input from multiple team members.
Step 3: Tracking and updating tasks in Backlog
Once you’ve set up your project in Backlog, it’s time to get to work. As team members complete work, they can assign tasks to other team members for review and update the status of their tasks.
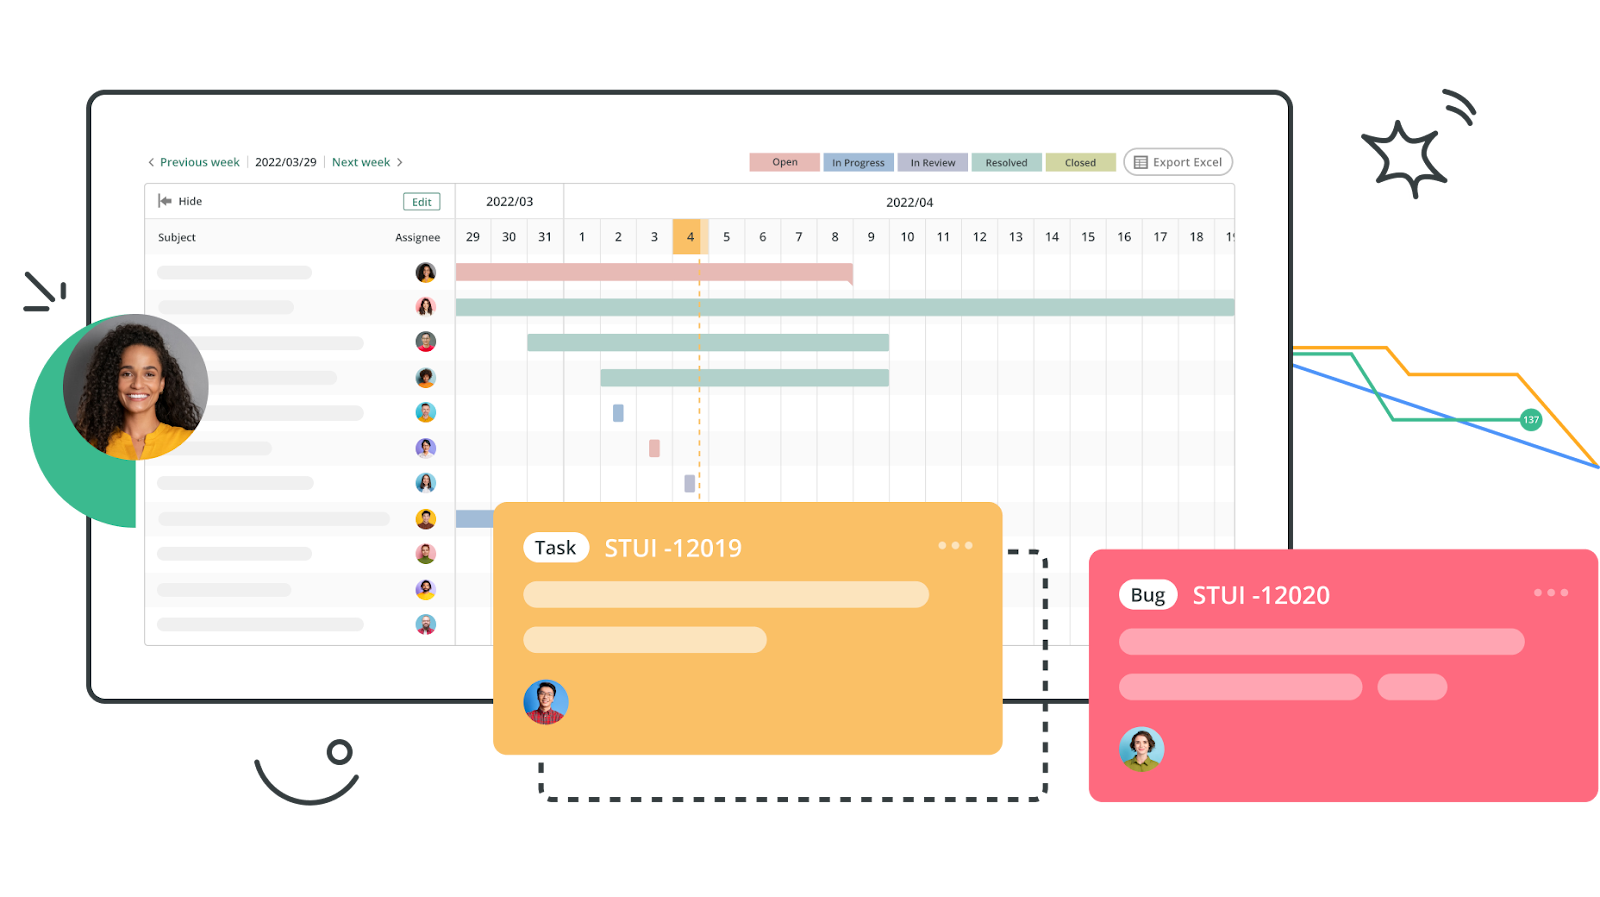
As work progresses, Backlog makes it easy for project managers to stay on top of their team’s work and understand progress toward the project’s goals. The platform comes with a range of visual project management tools that make it easy for project managers to stay up-to-date on progress, including:
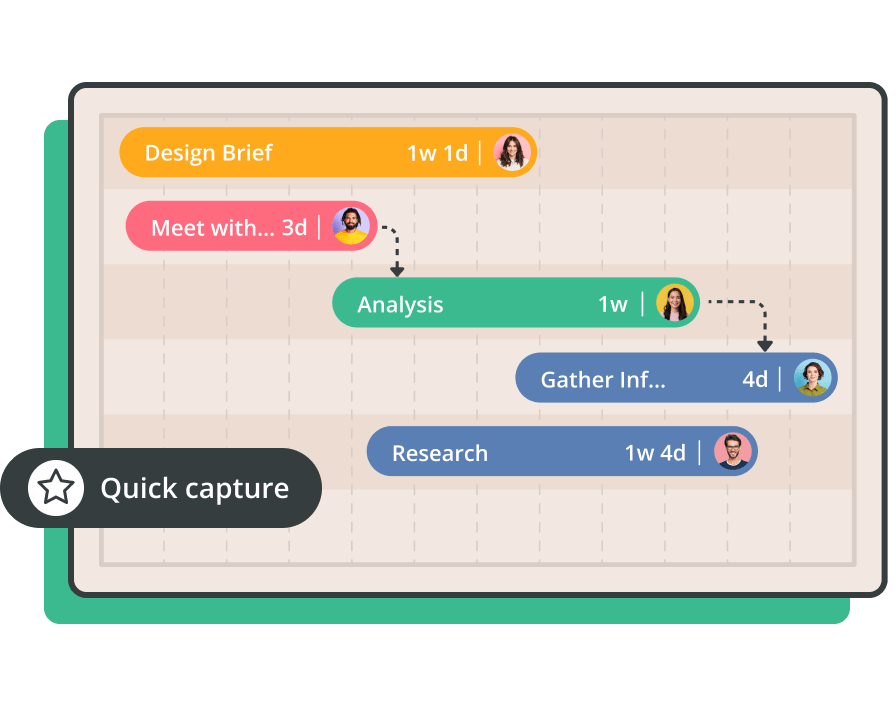
- Gantt charts: These charts display how your team is progressing compared to the timeline specified at the beginning of the project. They help teams make changes quickly, proactively address potential roadblocks, and better manage their workload.
- Kanban boards: A classic agile project management framework, kanban boards display the status of tasks as they progress through different stages of your team’s workflow. In Backlog, kanban boards are fully customizable, allowing teams to optimize their workflow.
- Burndown charts: These charts illustrate the progress of your project toward completion, serving as a visual representation of your team’s progress compared to the initial project plan. They’re useful for identifying bottlenecks and ensuring teams meet their project deadlines.
Provided your team keeps Backlog updated with all their progress, these visual tools make it easy for project managers to manage several projects simultaneously.
Step 4: Customizing and automating task creation in Backlog
We already touched on one of the ways that tasks can be customized in Backlog: by creating custom fields in issue descriptions. But there are also several other ways to customize Backlog to ensure it fits seamlessly into your team’s existing workflows.
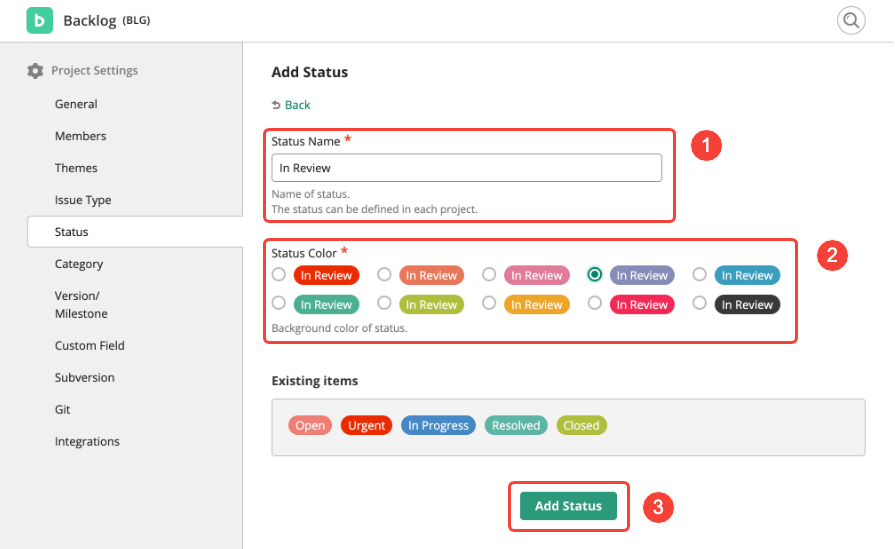
One popular customization option is creating custom status types. Backlog comes with several default task status levels (open, in progress, in review, and so on). If these don’t reflect your team’s workflow, you can create your own status levels instead. Navigate to Project Settings, select Status, and click Add Status. Give your status a name and color, then click Add Status to save it. You can create up to eight custom statuses for each project.
In addition to customizing your tasks, you can also automate task creation. Many Backlog users generate Backlog issues from support tickets using automated task creation, bringing greater efficiency to bug tracking and customer support issues.
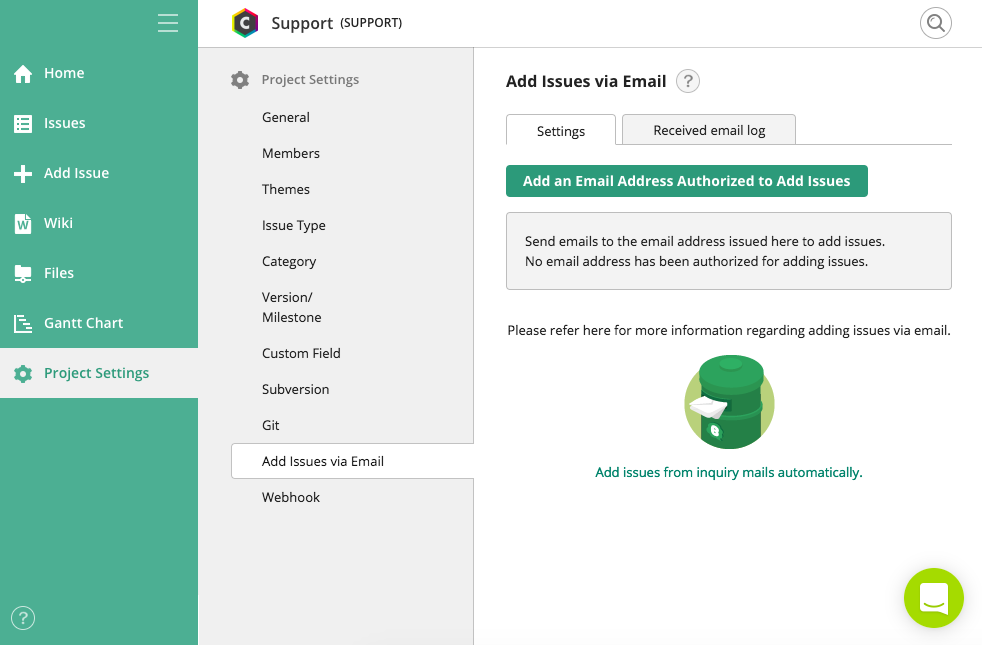
To set up automated task creation from emails, navigate to Project Settings and click the Add Issues via Email tab. Setting up this integration allows Backlog to create issues using a pre-built template every time a user submits a support request to your business’s customer support inbox. This, in turn, ensures that your development team is aware of potential bugs as soon as users flag them, leading to improved response times and better user experiences.
How to collaborate and communicate with your team and clients in Backlog
Backlog is designed to serve as a hub for all of your startup’s work. It’s an all-in-one project management tool that helps teams work together more closely with internal and external partners.
Many of Backlog’s collaboration features make it uniquely well-suited to projects involving a wide range of stakeholders, from internal projects involving several teams to collaborative projects with clients. Many client-facing companies invite their clients into Backlog, giving clients the ability to add new tasks and interact with their account team.
Some of Backlog’s most popular collaboration tools include:
- Task delegation: Teams can use Backlog to assign tasks to individuals and track progress, giving everyone increased visibility into key processes.
- Comments and notifications: Team members can tag colleagues in comments to share updates and ask for feedback.
- Project wikis: Store important resources and project guidelines in wikis, centralized resource hubs for every project.
- File sharing: Upload files to a shared file library to quickly access important documents.
- Integrations with popular communication apps: Backlog comes with easy-to-setup integrations with widely-used enterprise communication platforms such as Slack and Microsoft Teams, ensuring everyone stays updated on project progress.
With Backlog, your team can spend less time planning work and more time focusing on the essential tasks that move the needle.
How to control and monitor code quality in Backlog
For many startups, the quality of their code is central to the success of their business. Startups often compete with larger, more established players with far more resources. Upsetting the odds and disrupting the status quo demands that startups offer customers a high-quality product.
To provide a high-quality user experience, startups need to write high-quality code. Backlog gives software development teams the code management platform they need to control and monitor their team’s code quality. By using Backlog, teams can manage their code directly alongside their project work, making for a more efficient approach.
Backlog offers users a variety of tools to control and manage code, including:
- Code repositories: Backlog integrates with both Git and Subversion, allowing development teams to easily access code repositories for every project straight from the Backlog platform.
- Version control: Developers can review new code together before merging new branches to the main codebase for a project. Commit history tools help everyone understand what changes were made and when and make it easy to revert to earlier versions known to be stable when there are issues.
- Code review: Exchange inline comments to discuss new code, tag team members for review, and use Backlog’s difference viewer to understand proposed changes before submitting pull requests.
- Bug tracking features: Automate the creation of bug issues in Backlog and quickly assign them to developers based on current workloads. Track every bug from report to resolution with tools like Kanban boards.
- Integrations to developer tools: Backlog integrates seamlessly with the tools development teams already rely on, including Jira, Jenkins, LambdaTest, and more.
These tools, combined with Backlog’s powerful project management features, give developers all the resources they need to take a more efficient approach to managing code quality.
How to report and analyze project performance in Backlog
As work progresses, project managers are often responsible for reporting on their team’s performance. This reporting and analysis is crucial in ensuring that projects remain on track and deadlines are met.
We already discussed some visual tools teams can use to quantify their project progress in Backlog better: Gantt charts, kanban boards, and Burndown charts. Team leaders can use these charts to quickly understand their team’s performance and share them with founders and other senior leaders to illustrate their progress toward project goals.
In addition to these visual tools, Backlog users can opt-in to receive daily and weekly email reports summarizing project progress.
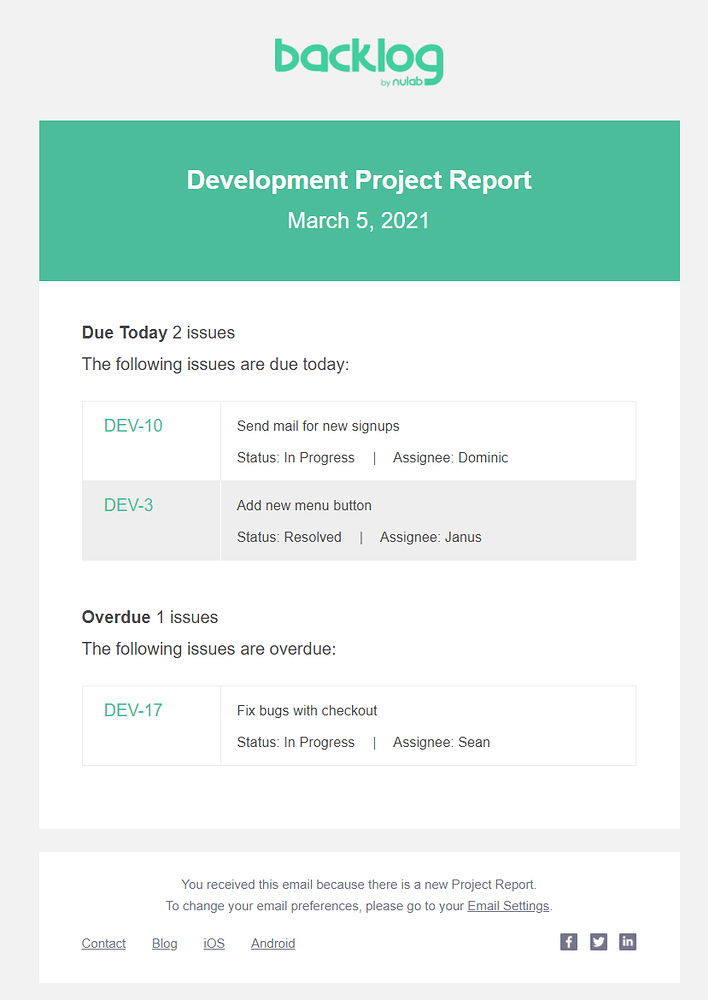
Daily project reports are sent each day. They summarize the tasks that are due to be completed that day, as well as any overdue tasks that have not yet been completed. Recipients can view the task’s status and the person it is assigned to.
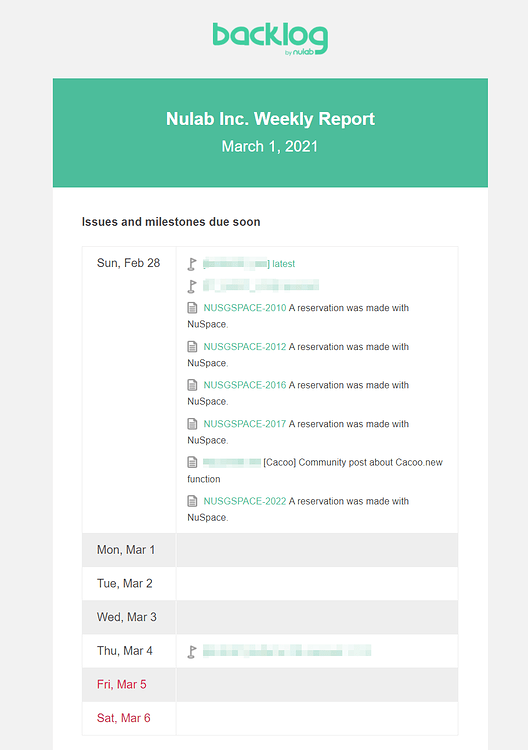
Weekly summary reports are sent each Monday and summarize all projects in an organization’s Backlog space. This email highlights the issues and milestones scheduled to be completed in the upcoming week and provides users with a personalized summary of the tasks they completed in the past week.
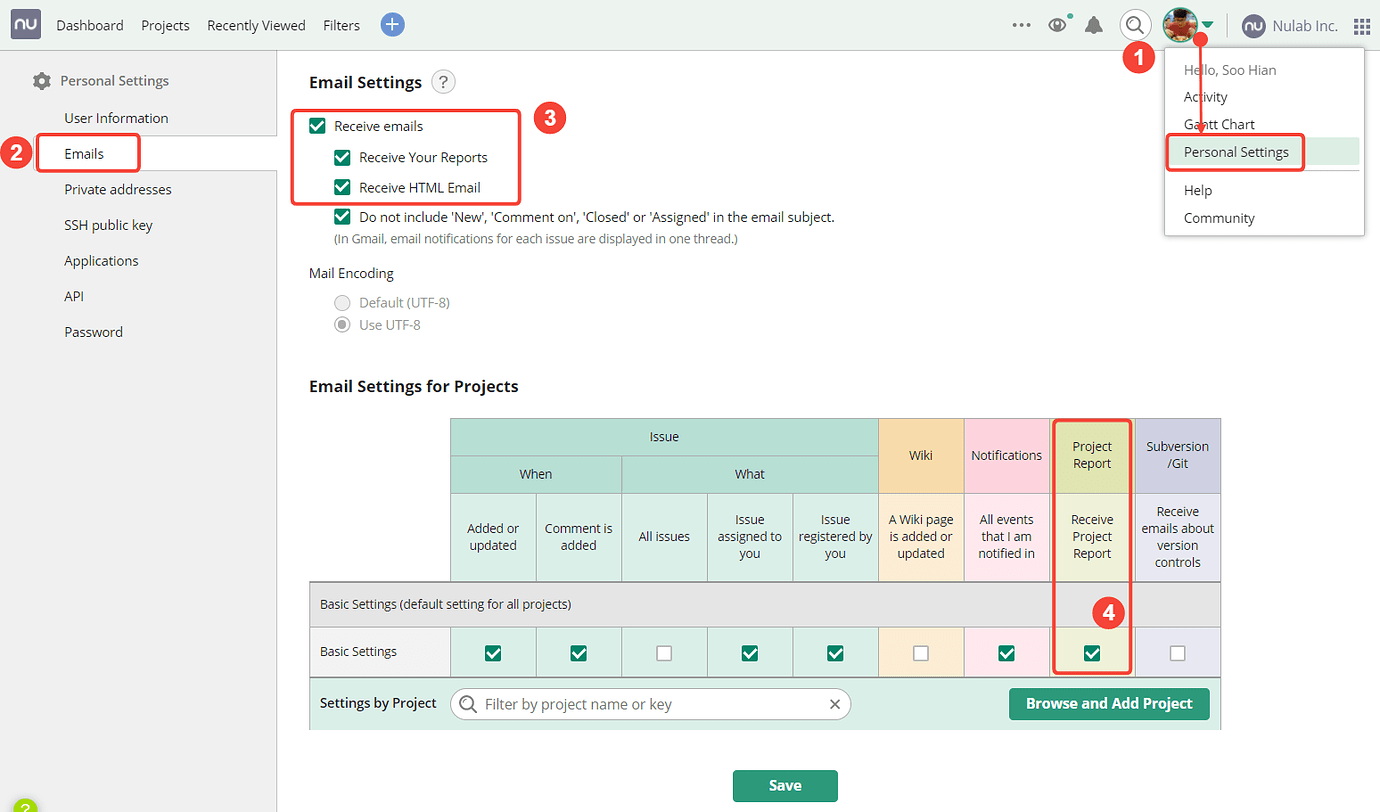
These email reports can be enabled in the Profile section of Backlog. Navigate to your Personal Settings, click the Emails tab, and then check the box to confirm you would like to receive emails. Scroll down to select which types of email you would like to receive.
Start scaling more efficiently today with Backlog
Adopting a sophisticated approach to project management is a key step in the scaling process of all startups. As teams grow and projects become more complex, it’s vital to have a proven framework that ensures work is completed on time and to the required standard.
Using project management software like Backlog, startups can streamline project organization and better collaborate internally and with clients. With a range of tools that make for easy code management and comprehensive reporting, Backlog will help your startup achieve its goals more efficiently.
About Author

Backlog Staff
Guest authorBacklog is the all-in-one project management software by Nulab. Combining task management, version control, and bug tracking, Backlog delivers the features teams need to create great projects in one simple tool.


