How to create an awesome workflow diagram (and why you should)
Georgina Guthrie
May 27, 2024
A workflow diagram is a step-by-step, linear representation of a business process from start to finish. It shows how individual tasks, actions, or resources flow between different people or groups. It also shows the actions your team must take to finish a task.
Tasks are generally represented as boxes and diamonds, although images or real-life pictures can also be used. Each shape or image connects to another via an arrow, which shows how those tasks are related to each other and the type of action they require.
Workflow diagrams also give a broad overview of a business process. As a result, they often serve as a springboard to other more granular process diagrams, such as data flow diagrams, flowcharts, and more.
What are workflow diagrams useful for?
To create a workflow diagram, you’ll first need to conduct a workflow analysis. This is essentially a deep dive into your team or organization’s current way of completing tasks, including the sequence of work and the responsibilities of different employees.
The data you collect will help you lay out your initial workflow diagram. Whether your goal is to standardize certain processes, identify project-critical jobs, or locate weaknesses and bottlenecks, visualizing your workflow will help give your plans a broader context.
Quick visuals also help every team member understand what they’re doing and how they fit into the wider business process, creating greater levels of cohesion and cross-department collaboration.
Workflow diagram vs. data flow diagram vs. flowchart
Workflow diagrams, data flow diagrams, and flowcharts all involve various shapes and arrows. And they all require the reader to move through them from left to right and/or top to bottom. But they all do slightly different things.
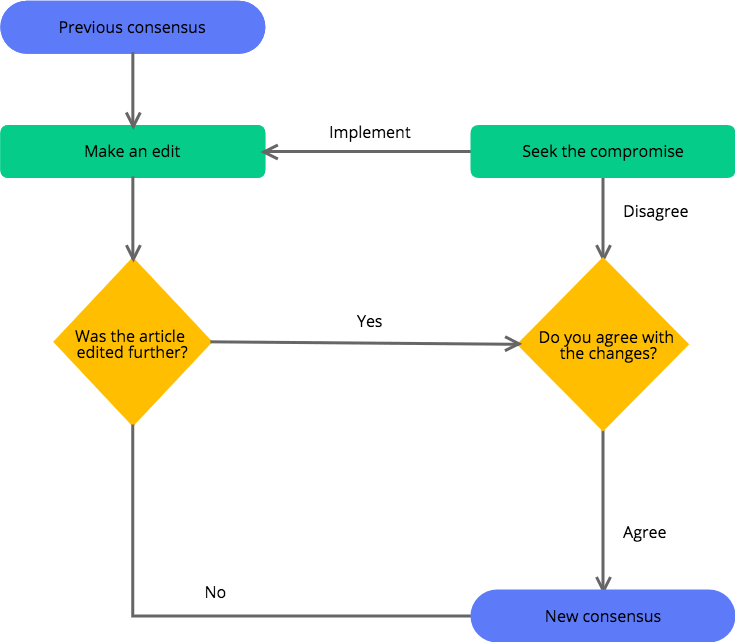
A flowchart leads you through a series of actions, things, or choices involved in making a complex decision. The idea is to guide you to the correct conclusive answer by breaking the big problem down into smaller, manageable chunks.
A data flow diagram (or DFD for short) shows you how processes flow through a system, taking into account where things come from, which route they go through, where they end up, and the process itself.
A workflow diagram is a type of flowchart that depicts the movement of tasks or actions from one person or group to another.
When should you use one?
Workflows were born in the manufacturing industry around the late 1880s when labor was going through a transformation. Scientific management professional Frederick Winslow Taylor, together with management consultant Henry Gantt (father of the Gantt chart), was leading the movement towards labor organization and devising ways to improve quality management through a range of processes, one of which was the workflow diagram.
This simple tool, along with other process improvement methods (including Six Sigma), helped organizations streamline processes and remain competitive in growing markets. That doesn’t mean workflow visualization tools are only for manufacturing, though. Now, organizations of all kinds adopt it to give them a clear overview of the processes within their businesses.
Here are four examples of how they can be used to track and improve any process in any industry.
- Project management — A workflow diagram can identify inefficiencies and help project teams understand and optimize their internal processes, leading to quicker delivery and higher-quality deliverables.
- E-commerce — A workflow diagram could show the steps a customer takes as they progress through the purchasing journey, including pre- and post-sale decisions, order submissions, shipping, and delivery.
- Education — A workflow diagram could show the stages a student goes through while choosing a university, from open days to online registering and beyond.
- Medical — A workflow diagram could show the stages a patient goes through during an examination, from booking to arriving at the hospital to receiving their results.
- App developer — A workflow diagram could show the stages of app development, from brainstorming and planning to wireframing, design, programming, launch, and bug reporting.
What do the symbols and shapes mean?
While the standard workflow diagram shapes are commonly used and easily understood, you can also use pictures or other symbols.
- Oval: This signifies the beginning and endpoints of a process. You’ll find ovals at the edges of your diagram.
- Rectangle: This is where you put instructions or actions.
- Diamonds: These signify decisions. Just like in a flow chart, diamonds contain a question, which leads to a ‘yes or no’ decision you must answer to progress.
- Arrows: These connect the shapes. Follow the arrows to the next step.
- Circle: Circles act as connectors; they’re used when the reader has to make a leap from one section to another, bypassing other stages. Circles connect via arrows.
Essential components of a workflow diagram
Each shape and arrow represents a stage. Each of these stages can be assigned one of these three statuses.
Input
An input status refers to something that influences the following step. It could refer to an action, equipment, decision, information, or capital.
For example, if you worked in a marketing agency, one input may be ‘create a logo design.’ If you’re using shapes, you’d put this inside a rectangle. If the next stage is ‘add the words to the logo,’ then the next input would be ‘copy team create tagline.’ An arrow would connect these tasks.
Transformation
Transformations refer to the changes that inputs go through to reach the output. This could refer to a change in physical characteristics (i.e., the design is converted to a digital app), a change in location (i.e., the customer moves from the street into the shop), or a change in ownership or purpose.
Output
Output is the finished product; it’s what happens after the transformation.
Different types of workflow diagrams
Workflow maps come in many varieties. Here’s a quick run-through of the most popular workflow diagram examples.
Process flow diagram
A process flow diagram is the most basic form of workflow layout. Simply map the process of the workflow out chronologically. And voila!

Swimlane diagram
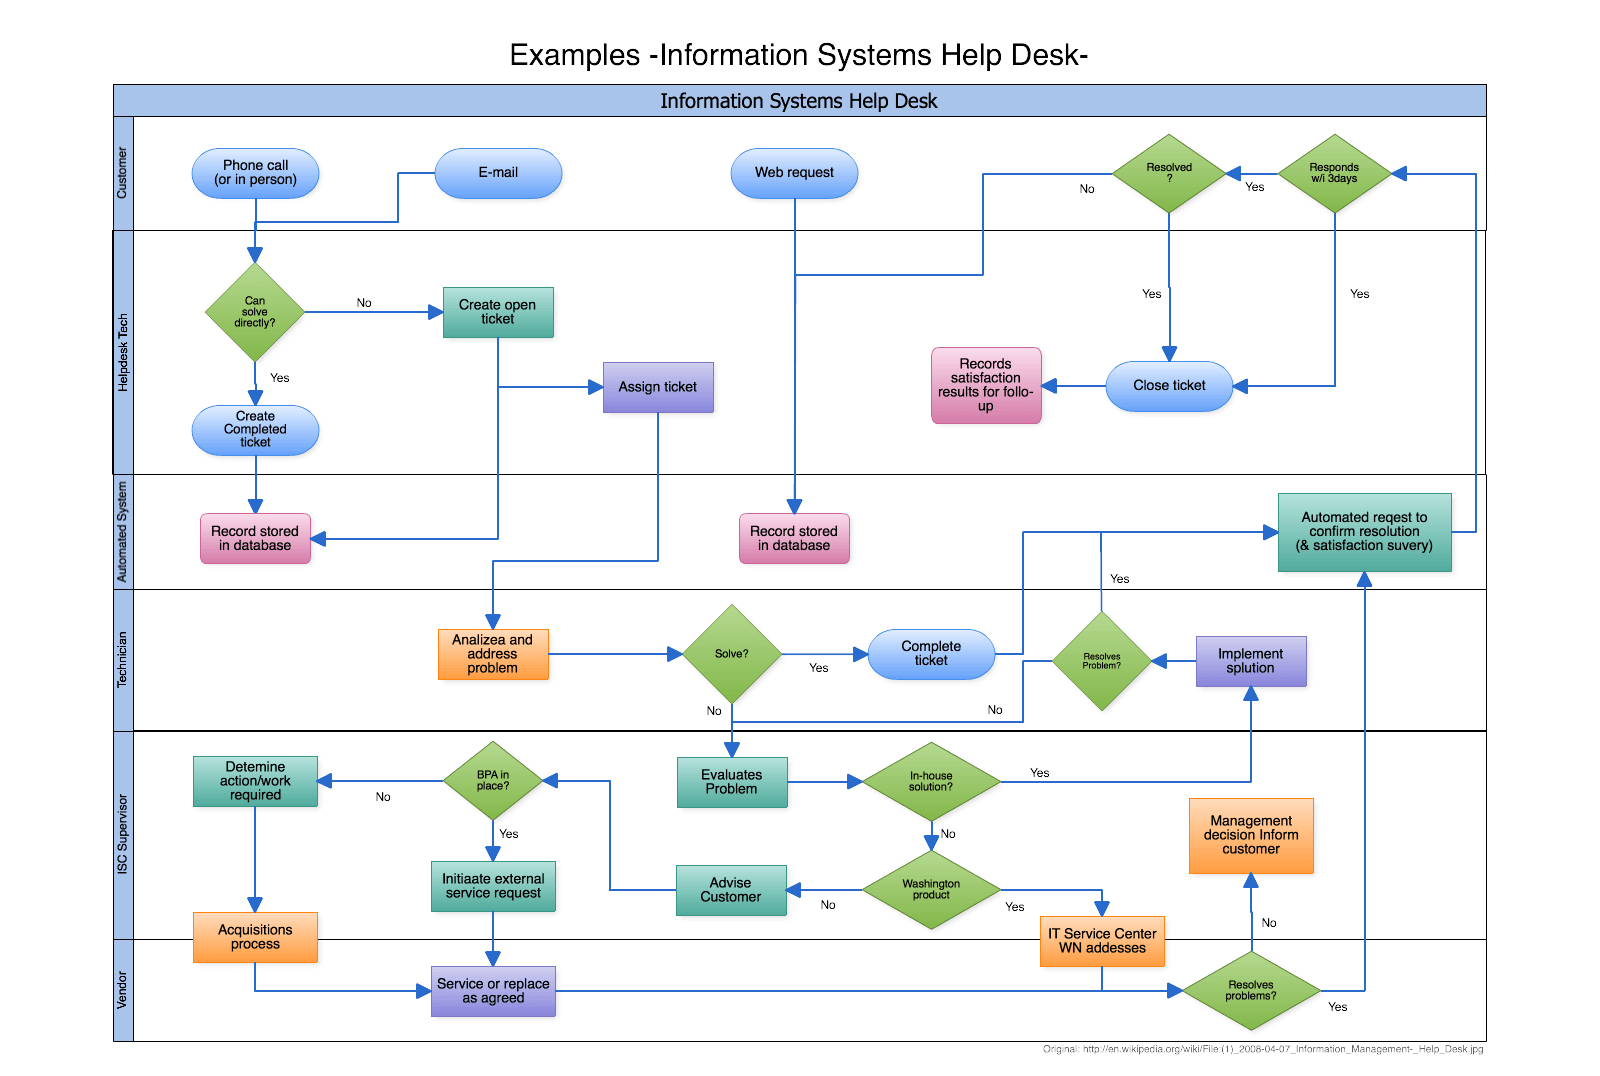
Swimlane diagrams separate two or more flows within the organization while retaining their sense of inter-connectedness. It offers a broad overview of different processes and highlights their interaction, including positives and inefficiencies.

Business Process Modelling Notation (BPMN)
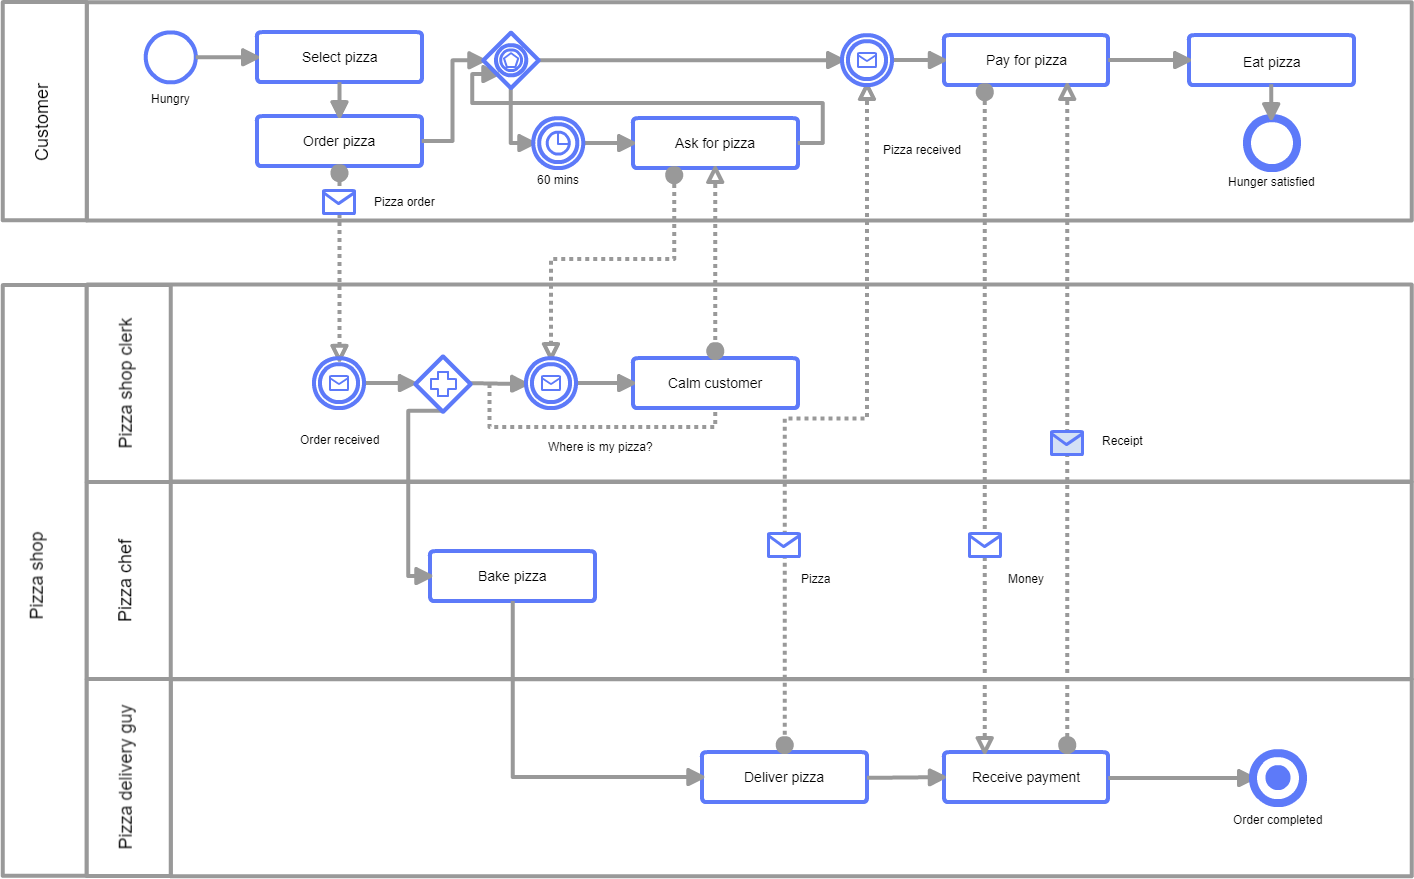
This business process diagram uses standardized symbols to make it easy for everyone to understand it, whether they’re business or technical users.

SIPOC diagram (Suppliers, Inputs, Processes, Outputs, & Customers)
A form of swimlane diagram, SIPOC charts focus on analyzing the different aspects of a workflow and distinguishing their levels of importance. Unlike traditional workflows, the order of the steps isn’t the priority. Instead, SIPOC diagrams show who creates and receives the data.
UML diagram
Software developers use Unified Modeling Language to map the components of a system and how they relate. Depending on the type of UML diagram, they may focus on the structural design or dynamic behavior of a system.
For example, activity diagrams are a UML subtype that depicts a sequence of activities the system performs. On the other hand, a UML class diagram shows the static relationships between objects in the system.

Emerging trends in workflow diagramming
As digital technology advances and teams become more agile, workflow diagramming trends have evolved to accommodate these shifting needs.
User-centric design: User-centric workflow diagrams incorporate user feedback loops and intuitive interfaces, simplifying complex diagrams for better comprehension across technical and non-technical audiences.
Cloud collaboration: Cloud-based, collaborative platforms like Cacoo enable real-time editing, sharing, and version control of workflow diagrams among globally distributed teams. Team members can simultaneously work on the same diagram, with changes synced across devices. Version histories allow tracking of revisions and rollbacks when needed.
Integration with business tools: Workflow diagramming software like Cacoo increasingly integrates with other applications, such as ERP systems, project management platforms, BI tools, and communication tools. This integration provides a comprehensive, end-to-end view of business processes, enabling teams to visualize workflows in the context of real-time data from other business-critical systems.
By incorporating these emerging trends, organizations can leverage workflow diagramming’s full potential to drive process improvement, enhance collaboration, and achieve greater operational efficiency in today’s rapidly evolving digital landscape.
Why use workflow diagrams in project management
Workflow diagrams offer numerous key benefits when managing project teams:
- Business process optimization and standardization: By mapping out processes, workflow diagrams help identify inefficiencies, bottlenecks, and areas for improvement, enabling process optimization and standardization.
- Risk management: Visualizing processes through workflow diagrams can help project teams identify potential risks and points of failure. For example, a workflow diagram of a software development process may reveal an over-reliance on a single developer for multiple critical tasks, highlighting a risk if that person leaves the project.
- Resource allocation: Workflow diagrams provide visibility into the sequence of tasks and the roles/teams involved, allowing for optimized resource allocation. In a marketing campaign project, the workflow diagram could show which tasks require graphic designers, copywriters, or web developers, enabling better resource planning.
- Change management: When processes need to be modified due to changing requirements or external factors, a clear workflow diagram can help project teams visualize the impacts and plan for smooth transitions. For instance, if a supplier changes in a manufacturing process, the workflow diagram highlights all the affected tasks and handoffs.
- Project planning: Workflow diagrams aid in project planning by clearly depicting the logical flow of activities, dependencies between tasks, and potential bottlenecks. This information can inform realistic timelines, milestones, and critical path identification.
- Execution and monitoring: During project execution, a workflow diagram can serve as a reference for team members to understand their roles, responsibilities, and handoffs. They also enable monitoring by highlighting deviations from the planned process flow, allowing for corrective actions.
By providing a comprehensive visual representation of processes, workflow diagrams empower project teams to proactively manage risks, optimize resource utilization, adapt to changes, and maintain control throughout the project lifecycle.
Common mistakes to avoid
While workflow diagrams are powerful tools, it’s essential to avoid common pitfalls:
- Lack of clarity: Poorly designed or overly complex diagrams can be confusing and defeat the purpose of visual representation.
- Incomplete information: Failing to gather comprehensive information from all stakeholders can lead to inaccurate or incomplete workflow diagrams.
- Neglecting updates: Processes evolve over time, and neglecting to update workflow diagrams can render them obsolete and ineffective.
- Lack of standardization: Using inconsistent workflow diagram symbols, shapes, or notations can hinder understanding and collaboration.
Best practices for creating effective workflow diagrams
To maximize the effectiveness of any workflow diagram, align your process with the following best practices:
- Unified modeling standards: Incorporating standards such as Business Process Modeling Notation can help improve cross-organizational and cross-industry understanding of workflow diagrams. Business Process Modeling Notation provides a standardized set of shapes, symbols, and notation, facilitating seamless process communication and knowledge transfer across teams, departments, and partner organizations.
- Stakeholder involvement: Engage all relevant stakeholders throughout the diagramming process to ensure accuracy, buy-in, and a comprehensive understanding of processes.
- Standardized notation: Use standardized shapes, symbols, and notation to promote clarity and consistency, especially in cross-functional or cross-organizational contexts.
- Iterative refinement: Regularly review and update workflow diagrams to reflect process changes, improvements, and evolving business needs.
- Training and documentation: Provide proper training and documentation to ensure all team members can effectively read, interpret, and contribute to workflow diagrams.
- Integration with processes: Integrate workflow diagrams into existing business processes, using them as living documents rather than static representations.
- Measurable objectives: Define clear, measurable objectives for each workflow diagram, such as identifying bottlenecks, streamlining processes, or improving collaboration.
By incorporating these emerging trends and following best practices, organizations can leverage workflow diagramming’s full potential to drive process improvement, enhance collaboration, and achieve greater operational efficiency.
How to create a workflow diagram
Okay, ready to make your own workflow diagram? Let’s get started.
1. Select your process
First, you’ll need to work out what process you intend to track and, most importantly, why. What do you hope to discover? This will inform your choice of diagram. It’s also important to remember who will see and use this diagram. If non-technical people are going to see it, then you may want to create a BPMN chart, so everyone understands what the symbols mean.
It’s also important to distinguish between whether your workflow depicts a process as it currently stands or a future one you hope to implement.
2. Define the start and endpoints
Whatever happens in between is up to you, but make sure you have a clear kick-off point and end goal.
3. Gather together your information
Speak to different people and departments and gather information to ensure your workflow is as accurate as possible. Outline which activities are involved in each step, and label who is in charge of these decisions or tasks.
You should also note process timelines, deviations, potential bottlenecks, and potential improvements.
4. Eliminate inefficiencies.
Next, take a look at your tasks and categorize them into ‘must-have,’ ‘useful,’ ‘nice to have,’ and ‘not necessary.’ This will help you streamline your process and assign jobs to the appropriate people.
To categorize tasks, refer back to your overall goal and the company’s overall goal. Is a specific task contributing to this goal? If it’s not, consider putting it on the ‘not necessary’ pile.
5. Design the workflow
Now, it’s time to turn all that data into lovely visuals. Whether you use a pen and paper or a diagramming tool is up to you. But whichever method you choose, make sure it’s easily shareable, editable, and simple to use.
6. Analyze your results
Are there any bottlenecks? Are certain processes taking too long, or are some stages more expensive than they should be? Can you improve efficiency through automation? These are all valid questions to consider.
Final thoughts
Once you’ve actioned your workflow diagram and tweaked your processes, review your tasks. If necessary, repeat the process again a few months (or years) down the line to continually improve as you go.
Be sure to share your diagrams with your team and ask them to contribute ideas and input to make each iteration of your workflow as efficient as possible. To make things easier, try using a cloud-based diagramming tool that your entire team can work with simultaneously. The more eyes on your diagrams, the better your chance of creating a flawless process.
This post was originally published on March 12, 2019, and updated most recently on May 27, 2024.


